No matter whether you are running a small or medium-scale business, data is the most important asset for the company. Due to this, it becomes more important to keep it secure from unwanted online threats. Similarly, keeping the QuickBooks company file safe is crucial as it carries all the sensitive business information. But what if you can’t access it due to QuickBooks Error 6177?
Isn’t it disruptive, as it might increase the chance of getting company data into the wrong hands? In that case, getting it fixed at the right time is all you can do. For this, go through this blog and find the best ways to resolve the error in the least time possible.
Are you facing difficulty while fixing the QuickBooks Error 6177 on your own? If that’s the situation, we suggest you have a conversation with our QuickBooks professionals to resolve your query promptly.
Table of Contents
ToggleQuickBooks Error Code 6177:- A Quick Introduction About the Issue.
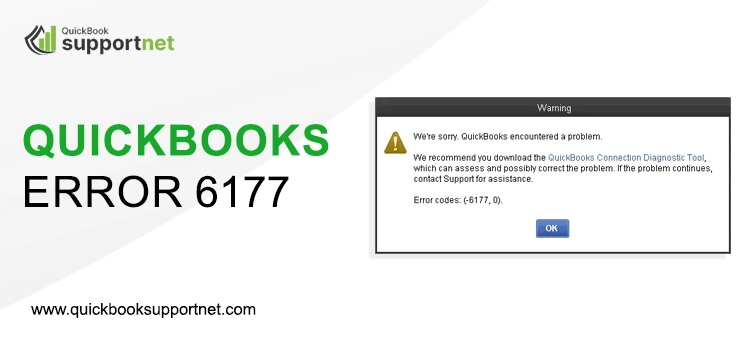
When the users encounter QuickBooks Error Code 6177 while accessing the data file stating, “We’re sorry, but QuickBooks can’t open the company file.” This error mainly indicates that the users won’t be able to access their current data file. In other instances, it may also be triggered when your workstation doesn’t have enough permissions to access the particular data file.
So, if you are also on the same page and can’t open the file, you must find a way to overcome the issue. Below, in this article, we have stated all the possible causes, symptoms, and quick ways to fix QuickBooks Error 6177.
What are the Possible Factors That Might Lead to QuickBooks Company File Error 6177?
Are you looking for the root causes that may trigger QuickBooks Company File Error 6177? In that case, you don’t have to go anywhere else, as we have discussed all the provoking factors that result in this error below. So, have a look at the causes written below and get a better understanding of the issue.
- You might see QuickBooks Error 6177 when there is any damage or corruption in the company file.
Sometimes, it may trigger while operating an unsupported version of the QuickBooks and Windows operating system. - Also, it may happen when you need to use an adequate internet connection, which stops users from accessing their QuickBooks company files.
- Another possible reason may be that the location of the QuickBooks company file is changed.
- Moreover, it may also happen when the Windows Firewall obstructs the users from opening the company file, leading to QuickBooks Error 6177.
Indications Of QuickBooks Error Message 6177
Below, we have listed some instances when the users might see the QuickBooks Error Message 6177 on their computer screen. Have a look at the pointers below, which will help you fix the error.
- You may observe the continuous freezing and crashing of the QuickBooks program.
- In other cases, you may discover that your Windows operating system starts freezing and responding slowly to the user’s commands.
- Due to the QuickBooks Error Code 6177, the users won’t be able to access their data files, which might lead to delays in the ongoing business tasks.
- You will see the QuickBooks Error 6177, with the error description on your computer screen.
Quick Resolution Methods to Eliminate Error 6177 QuickBooks Effortlessly
Do you need help figuring out how to handle Error 6177 QuickBooks? If that’s the scenario, you must look at the troubleshooting methods discussed below. Ensure that you implement the steps in the same manner as listed below without skipping any step to avoid further discrepancies.
Measure 1: Try Updating Your Company File Location:-
The QuickBooks may fail to access the data file on the Server, an external drive, or a cloud. In that scenario, to fix the issue, you only need to switch the location of the QuickBooks company file. Please go through the following procedure to shift it to the local drive and return it to its original location.
A. Transfer Your Company File
- To begin the process, hit the Windows key on your keyboard on your workstation or server computer.
- Thereon, you must include “File Explorer” in the search panel and press the Enter key to launch the File Explorer window.
- Next, locate and open the QuickBooks folder. Alternatively, you may hit the F2 key to launch the Product Information window to trace your company file location.
- You must locate your company file with the file extension “.qbw“.
- Subsequently, you must jot down your drive’s name and location, which will be represented as “C: >> User >> Documents >> Intuit >> QBFiles >> Sample_Product-based business.qbw.” Later, you have to move the file back to its original location.
- Furthermore, transfer your company file from the C: folder. Herein, you must remember that you only transferred the company file, not the entire folder.
B. Construct a Portable Company File and Restore it to the Server.
You will see that your company file is now available on your local C: drive. Now, you can easily generate a portable company file, a compact version of your data.
- To generate a portable company file, launch QuickBooks Desktop on the computer where you have shifted your data file.
- After this, choose the “Open or Restore an Existing Company” option and launch the company file you have shifted to C: drive.
- Now, you must generate a portable company file. With this, you will notice that it will construct a portable version of the data file, which will refresh your company file location data.
- Switch to the File menu > Quit QuickBooks and relaunch the QuickBooks application on your device.
- After this, access the File menu again and pick the Open or Restore Company option.
- In the next stage, choose the Restore a Portable File > Next option to continue.
- You are supposed to look for the portable company file (QBM) that you have recently created. After this, you only need to click the Open and Next buttons.
- Thereon, to restore the location, pick the drive from where you have shifted your company file. You have noted down the location in the previous stage.
- Afterwards, hit the Save button, and it will place your QuickBooks data file back on your network.
- At last, once again, shift to the File menu and navigate to the option that states “Quit QuickBooks.”
Measure 2: Get the Newly Launched Version of QuickBooks Desktop
To install the latest QuickBooks Desktop version, follow the instructions below.
- Begin the update process by launching the QuickBooks Desktop on your computer.
- After this, shift to the QuickBooks Help menu > Update QuickBooks Desktop option.
- Thereon, hover your cursor over the Update Now followed by the Reset Update option.
- In the next step, hit the Get Updates option, and it will take some time to get the latest Update from the Server.
- Once you finish the update process, shut down QuickBooks and try to re-open the application.
- Finally, you will receive a pop-up message to Install the Updates and then hit the Yes button to proceed further.
Measure 3: Configuring the Company File Path Manually
To fix the issues with the company file path, you must search for the ND file and then resolve issues with QuickBooks Database Server Manager.
A. Locate Your ND File
- Begin the process by launching the File Explorer on your server computer.
- After this, look for your QuickBooks folder and look for the file naming with your company file name with ND as the file extension. You will see that the file name will be represented like this : [MyCompanyFileName].qbw.nd.
- Now, you must right-click on the ND file to choose the highlighted Delete button. You don’t have to take so much stress for the security of accounting data as it would remain unaffected.
B. Fix Issues with the QuickBooks Database Server Manager
- To start the process, you must first download and install the latest QuickBooks Database Server Manager.
- Hit the Windows key on your keyboard, insert “Database” into the search area, and launch the QuickBooks Database Server Manager.
- Now, you must opt for the QuickBooks folder that contains your data files.
- Thereon, choose the Start Scan option and hit Close after completing the scanning part.
- At last, you have to set the folder permissions to ensure everything is correct.
- You are supposed to launch the data file on your device where you are encountering the issue.
Summing It Up!!
Here, we have arrived at the end of this comprehensive post, and it might help you regain access to the data file without getting QuickBooks Error 6177. If you still need help with any technical snags while rectifying the issue, you must get assistance from our professionals. They will instantly guide you with useful tips to resolve the issue under the expert’s supervision.
FAQ's
Ques 1: What is the procedure to fix the corrupted file in QuickBooks?
Ans. You can repair the corrupted file in QuickBooks using the rebuild data tool. Follow the steps instructed below to use the tool.
- Go to the File menu > Utilities and then hit the highlighted Rebuild Data tool.
- After this, you must hit the Update QuickBooks Desktop and reset the multi-user hosting.
- At last, you must transfer the company file to the hard drive and check if the issue is resolved.
Ques 2: What other company file errors must you face while accessing the QuickBooks company file?
Ans. The users can come across different company file errors than QuickBooks Error 6177 while accessing their company files like 6210, 6190,6176, 6147, etc.
Ques 3: From where do I locate my QuickBooks company file?
Ans. You can locate the QuickBooks company file through the following location such as: “C: >> Users >> Public >> Public Documents >> Intuit >> QuickBooks >> Company Files.” Alternatively, browse to the QuickBooks icon, right-click it, and hit the Properties option. After this, navigate to the Open File Location, and you will get your company file.
Ques 4: Can I run the QuickBooks File Doctor Tool with any version of QuickBooks?
Ans. Yes, the users can easily run the QuickBooks File Doctor Tool with any version of QuickBooks.
Ques 5: What would I do if nothing helped me fix QuickBooks Error 6177?
Ans. If the users get stuck with the QuickBooks Error 6177 while opening the company file and can’t resolve it using the resolution methods explained in this post. In that scenario, we suggest you contact our professionals directly and obtain useful suggestions to overcome the issue.