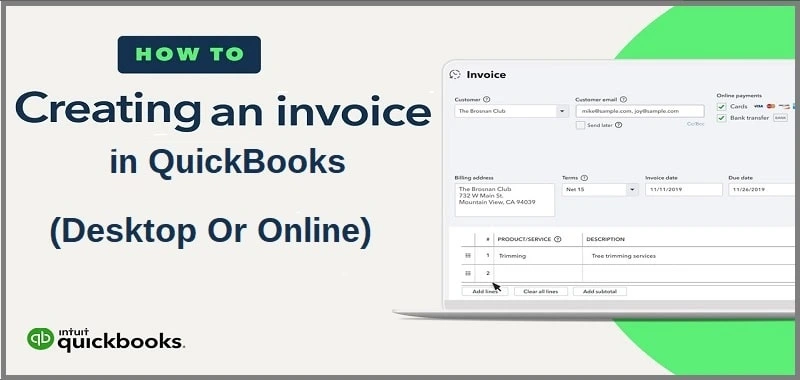
Creating the first invoice in QuickBooks? This post will teach you how to create your first invoice in QuickBooks online or desktop version. You can create invoices from estimates and scratch, which you can further share with your customers via mail. Generally speaking, depending on the type of transaction with your customer, you can create an invoice in QuickBooks in different ways.
Part A. Create An Invoice in QuickBooks Desktop
If you are using the desktop version of QuickBooks, then let’s take a look at different ways that you can follow to create an invoice in QuickBooks desktop;
- Without Sales order or estimate
- Creating an invoice for a sales order
A). Through Sales Orders Window
B). Through Invoice Window - Creating an invoice for an estimate
A). Through Estimate Window
B). Through Invoice Window
A.1. Creating Invoice Without Sales Order or Estimate in QuickBooks Desktop
If you want to create an invoice in QuickBooks without creating a sales order or an estimate, below are the straightforward steps you can execute;
- Firstly, on the home screen or the customer menu list, click on the “Create Invoices” option.
- Then, from the “Customer: Job” drop-down list, select your customer or customer job. If you have not listed the customer or customer job, click on the “Add New” option.
- After that, you will be asked to provide the relevant information at the top of the form, i.e., data invoice, bill to/ sold to, and terms.
- Now, select the items in the detail area. Note: After selecting or adding the item, the description, unit cost and amount will be added automatically based on the information you provided in estimates.
- To apply a discount for the invoice, its mandatory to have a discounted item.
- On the home page of the QuickBooks desktop screen, navigate to the lists menu.
- After that, select the product from the list and right-click on the free space.
- Then, click on the “New” option and click on the “Type” drop-down arrow, and select the “Discount” option.
- Now, enter the item name or number and provide a brief description.
- Provide the discounted amount or percentage under the “Amount or %” option. You can also directly enter the discounted amount in the sales form.
- After that, click on the “Account” drop-down list and select the income account you want to use to track discounts allowed to customers.
- Moving ahead, provide an appropriate item tax code and click on the “OK” option.
At last, end this process by clicking on the “Save and Close” option.
Congrats! You have now successfully created your first invoice on QuickBooks desktop.
A.2.Creating Invoice for Sales Order in QuickBooks Desktop
Let’s discuss the methods that you can perform to create an invoice in QuickBooks for sales orders;
A). Through Sales Orders Window
- Firstly, navigate to the sales orders in the main tab on the homepage of QuickBooks.
- After that, click on the “Create Invoice” option.
- Now, a prompt-up message will appear on your screen.
- Select the “Create Invoice for All of the Sales Order(s)” option if you want to add all items from the sales order to the invoice.
- If you want to add only some selected items to the invoice, select the “Create Invoice for Selected items” option.
- Thereon, provide each item’s quantity in the “To Invoice” column. On the other side, if you don’t want to add any listed items, then keep the quantity as zero.
- Finally, click the “Save and Close” option to save the changes.
Following the above-mentioned steps, you have successfully created an invoice in QuickBooks through the sales orders window.
B). Through Invoice Window
- On the home page of the QuickBooks desktop, click on the “Customer” menu option and select the “Create Invoices” option.
- Click on the Customer: Job drop-down list and select your customer.
- After that, select one or more sales orders that include the item you want to add to the invoice.
- Now, make the necessary changes in invoices related to quantity. In the list of items, add quantity in the “To Invoice” column for each quantity. It should be noted that if you don’t want to add any listed items, then put the quantity as zero.
- At last, save the invoice by clicking on the “Save and Close” option.
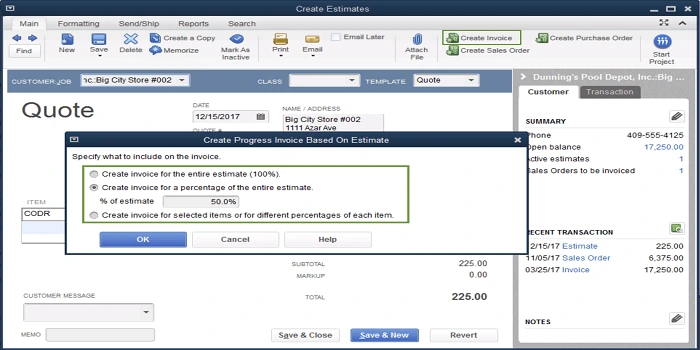
A.3. Creating Invoice for Estimate in QuickBooks Desktop
To clarify, an estimate is a quote you provide to your customer for the products and services. These estimates can only be converted to sales orders or invoices if the customer decides to purchase your product/ service. When a customer accepts your estimate, they agree to pay a fixed amount.
If you want to create an invoice in QuickBooks desktop for these estimates, then there are two different ways, which are as follows;
A). Through Estimate Window
Given below are the steps that you can execute to create an invoice in QuickBooks through the estimate window;
- Firstly, open the estimation in the QuickBooks desktop application.
- After that, click on the “Correct Invoice” option at the top of the estimated form.
- If you have enabled the progress invoicing feature, you may get a prompt message asking about the quantities and items to be added to the invoice.
- Thereon, the invoice will appear on your screen.
- Here, make the necessary changes in the invoice as per the need.
- At last, save the invoice by clicking on the “Save & Close” option.
B). Through Invoice Window
- On the QuickBooks desktop home screen, click on the “Create Invoices” option.
- Now, click on the Customer: Job drop-down list to see all the available estimates.
- Select the estimate which you want to add to the invoice. QuickBooks only allowed users to select up to 1 estimate at a time for creating an invoice.
- After that, an invoice will appear on your screen. You can edit the necessary changes as per the need.
- Once you complete the above steps, click on the “Save & Close” option.
Part B. Create An Invoice in QuickBooks Online
Let’s take a look at the methods that you can perform to create an invoice in QuickBooks online;
- Converting an estimate to invoice
- Creating a new invoice from scratch
B.1. Converting an Estimate to Invoice in QuickBooks Online
Now, we’ll guide you on how you can convert an estimate to an invoice in QuickBooks online.
- To begin with the process, click on the click on the “Sales” option available at the top left side on the dashboard of QuickBooks online.
- Under the sales option drop-down list, click on the “Customers” option.
- Now, click on the “Transaction List” option and scroll down to find the estimation.
- After that, click on the “Estimate” option to open it.
- Moving ahead, click on the “Create Invoice” option available at the top right side of the screen.
- Now, you can choose whether you want to convert the entire estimate or only a small portion.
- After that, click on the “Create Invoice” in the green color box.
- Thereon, QuickBooks online will open the invoice and automatically fills in the information from the estimate. Here, you can also make some changes as per the need.
- If you want to share the invoice with the customer via mail automatically, click on the “Save and Send” option. Whereas, if you are not ready to share the invoice, you can click on the “Send and Close” option.
You can easily carry out the steps mentioned above to create an invoice in QuickBooks online.
Also can Read – QuickBooks Not Responding
B.2. Creating a New Invoice From Scratch in QuickBooks Online
If you want to create an invoice in QuickBooks online without creating an estimation, below are the steps you can carry out to perform the same task;
- First and foremost, click on the “New” option available at the top left side of the screen.
- Under the “Customers” heading, click on the “Invoice” option.
- Now, click on the “Customer” insert field box and select your customer under the drop-down list.
- Thereon, provide the required details for the invoice and then click on the “Save” option. If you want to share the invoice immediately, click on the “Save and Send” option.
That’s how easy it is. By following the above steps, you can easily create an invoice in QuickBooks from scratch by completing the above-listed steps.
To Summarize
Congratulations, through this post, you have successfully learned how to create an invoice in QuickBooks desktop and online. If you want to know more about any of the features in QuickBooks, then you can get help from our QuickBooks experts. Our experts are available 24*7 around the clock to resolve your queries.