Looking for the solutions to fix QuickBooks error 121? You can get the right assistance here. QuickBooks POS error 121 is one of the many issues in the program, which is also referred to as a “Permission denied error.” This error occurs due to insufficient permissions to perform a task in QuickBooks Point of Sale.
To prevent this issue, you need to make sure that you have logged into the program as a system administrator. QuickBooks error code 121 can hamper your workflow adversely. To retain a smooth accounting management routine, you need to troubleshoot the error by reading this post until the end. Let’s start!
“Need instant help with QuickBooks error 121? Get one on one assistance by dialing our helpline number Call Us : +1-866-500-0076.“
Explanation For QuickBooks POS Error 121
QuickBooks Point of Sale Error Code 121 shows an issue when a user tries to log in as a system administrator. When the error occurs, an error message follows with the text –
“QuickBooks POS Error 121 denied you do not have permission to select from timeouts.”
There is a myriad of possible reasons that can give birth to the QBPOS error code 121. In the forthcoming section, we will discuss them all for the error resolution.
Recent Post – Resolve QuickBooks error code 15104
Possible Reasons Behind Error Code 121 in QuickBooks
QuickBooks Desktop POS error mainly occurs when you sign in to the program with the user account instead of signing in as an administrator. An admin account provides users with adequate permissions to perform crucial tasks in the program. Now that you have already received the error, a few simple solutions can help you with the error resolution.
Symptoms Of QuickBooks POS Error 121
If you need to determine if error 121 has occurred in QuickBooks POS, keeping an eye on the below-given potential signs can help:
- You will receive an error message on your screen that explains this erroneous condition.
- An ongoing task will be hindered by the arrival of the error message.
- The performance of the program will be affected by the POS error code 121.
- You will need to implement the relevant solutions for the resolution of the error code.
How To Put QuickBooks POS Update Error 121 To An End?
After discussing the important aspects of error code 121, we have reached the most crucial section, which is troubleshooting solutions for the error. Below are some tried and tested solutions that can help you eliminate the error with their correct executions:
Also Read – fix QuickBooks won’t open issue
1. Close All POS Processes & Services To Fix Error Code 121
Close all the POS processes and services to make sure no conflicting processes can interfere with an ongoing task. To do so, follow the below-given steps with the utmost care and attention:
- First things first, go to the Task Manager in order to open it.
- Here, you need to look for the POS Processes and Services from the list.
- You need to close them all here.
- Highlight the process you want to close and then click on the End Process button.
- Next, perform the same procedure for all processes one by one.
- After closing them all, you need to close the Task Manager process window.
- Once done, move to the Windows start button.
- In the specified search area, type “services.msc”.
- Thereafter, click Enter button to move ahead.
- Here, you need to locate the “QBPOS Database Manager XX,” where “XX” depicts the QuickBooks version.
- Finally, end the services and the service windows after concluding the procedure.
2. Delete The WSActivity Files
If the first method fails to bring the desired help, check if the next solution can resolve the QuickBooks error 121:
- You need to View the hidden folders by implementing the steps based on your Windows Operating System.
- If you are using Windows 8 and 8.1: C: Program DataIntuitEntitlement Clientv8.0.
- For Windows 7 users: C:Program DataIntuitEntitlement Clientv8.0
- Windows XP: C:DocumentsandSettingsAllUsersApplicationDataIntuitEntitlementClientv8.0
- Thereafter, you need to click on all the files in the opened folder & hit the Delete tab.
- Again, move to the previous location: C: Program DataIntuitQuickBooks Point of Sale XX.0.
- Moving ahead, navigate to the INI folder and delete the WSActivity file.
- Now open the QuickBooks POS again & install the latest updates.
- In the end, complete the final registration process to conclude.
Check if the QuickBooks error 121 is resolved or not. If the error persists, move to the next solution.
Also Read – Resolve QuickBooks Error Code 1926
3. End all POS Processes And Services As Your Final Solution
If QuickBooks error 121 continues to annoy you even after implementing the two procedures, follow these steps:
- In the first place, go to the Start menu and use it to open the Task Manager.
- Next, go to the Processes tab, wherein you may locate active POS processes and services.
- Highlight the below-listed processes:
- qbposexe.
- QBPOSDBServiceexe.
- QBPOSShell.exe
- Once highlighted, End them.
- Now close the Task Manager by clicking on the cross button.
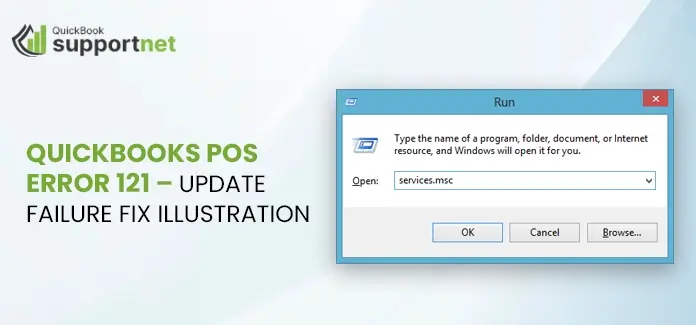
- Moving ahead, open the run box (Windows + R).
- Here, you need to type “Services.MSC” in the run box.
- Now click Enter button and locate the QBPOS Database Manager option.
- In the end, close the services.
Also Read – Fix QuickBooks Error QBWC1085
Summing Up!
QuickBooks POS error 121 can take place when you fail to sign in using the admin user credentials. However, the solutions described in this post can help you with the error resolution. For further assistance, you may chat with us or send an email to schedule a callback.