
How to Run the QuickBooks Print and PDF Repair Tool and More?
Apr 29, 2026
Admin |
Estimated Read Time : 5 MIN
If you can’t print, email, or save as a PDF from QuickBooks Desktop, it’s probably because either the related components are damaged or corrupted, or you don’t have enough permissions to run PDF and printing operations.
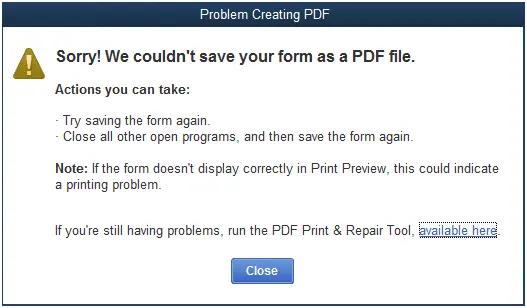
When such an interruption occurs, you will probably encounter a warning message that usually says that you can’t finish the process in QuickBooks. However, this error message can vary greatly depending on the root cause and the instance.
In this detailed guide, we will take you through a list of errors you may encounter when printing or saving as a PDF, how the QuickBooks Print and PDF Repair tool can help you fix the error, and the step-by-step instructions on how to resolve the error.
The QuickBooks Print and PDF Repair tool is one of the utilities in QuickBooks Tool Hub by Intuit that allows users to run it to identify and resolve common issues that appear when attempting to create a PDF, print, or email a document. It fixes issues like damaged print components, missing PDF components, and printer connectivity problems.
To run the tool, you must first download the QuickBooks Tool Hub, as we mentioned in the next section below.
How to Use the Print and PDF Repair Tool in QuickBooks?
Using the Print and PDF Repair tool in QuickBooks Desktop requires you first to download and install the QB Tool Hub, as discussed above. Make sure to install it in the latest version available (1.6.0.8).
Now, run the utility by following the steps below:
Launch QuickBooks Tool Hub.
In the left menu bar, choose Program Problems.
Hit on QuickBooks Print & PDF Repair Tool. The tool will take a minute or more to run; wait until then.
When done, try printing, emailing, or saving as a PDF in QuickBooks Desktop again.
Errors the QuickBooks Print and PDF Repair Tool Can Fix
If you’re encountering issues with printing or PDF creation in QuickBooks, the QuickBooks Print and PDF Repair Tool can help resolve various errors. Here are some common error messages the tool can fix:
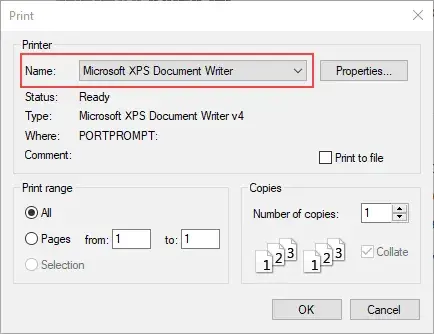
There is a problem connecting to your currently selected printer, Microsoft XPS Document Writer on the XPS port.
The reconciliation window disappears or doesn’t show
Other Ways to Resolve the PDF and Printing Issues in QuickBooks
If the PDF or printing issues persist, or if the QuickBooks PDF and Print Repair Tool fails to resolve the error, the problem may be due to insufficient permissions to use the XPS printer or other printing components. We will discuss these issues in detail in the following section.
Follow the troubleshooting steps carefully to ensure you can print and generate PDFs without any issues:
1. Restart and reset your temp folder permissions
Before proceeding to the complex troubleshooting steps, let’s restart the computer and reset the temp folder permissions:
a. Restart your computer.
Restart your computer and then try again. If this doesn’t fix the issue, reset the permissions on your temp folder.
b. Reset your temp folder permissions
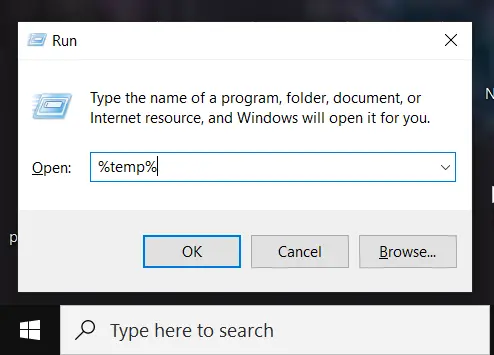
Launch the Run command by pressing the Windows + R keys.
In the Run prompt, type %TEMP% and press Enter.
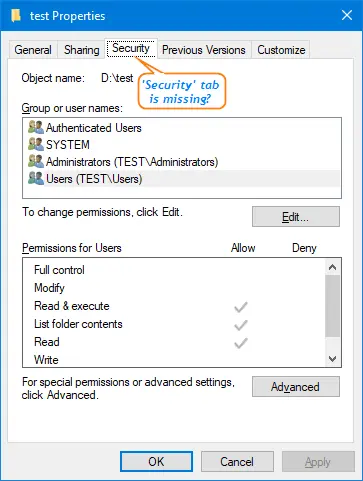
Right-click anywhere in the empty area of the temp folder, then choose Properties.
Now, choose Security, and ensure that all user names and groups have Full Control.
Once the permissions are set, try to save as a PDF again in QuickBooks.
c. Test if you can print to your XPS (only for Save as PDF and Email issues)
To check if QuickBooks can use the XPS Document Writer to save as a PDF, follow these steps:
Open Notepad.
Type “Test,” then go to File and select Print.
Choose the XPS Document Writer as your printer, then click Print.
Note: If you don’t see the XPS Document Writer, you’ll need to enable it on your computer first.
Give the file a name and save it to your desktop.
Go to your desktop and open the XPS file you just saved.
If you’re unable to print to the XPS Document Writer or any other printer outside of QuickBooks, you should reach out to your IT support or Microsoft for assistance.
Allow your computer to print to your XPS printer
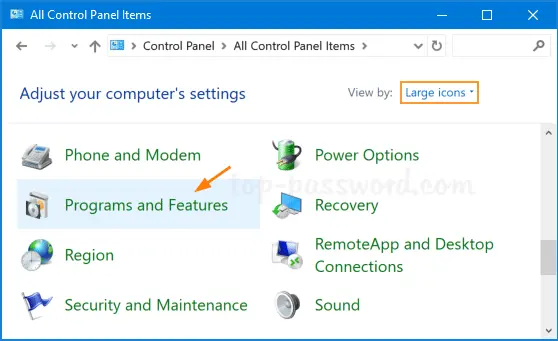
Open the Windows Start menu.
Type Control Panel in the search field and press Enter.
Now, switch it to Category view.
Choose Programs.
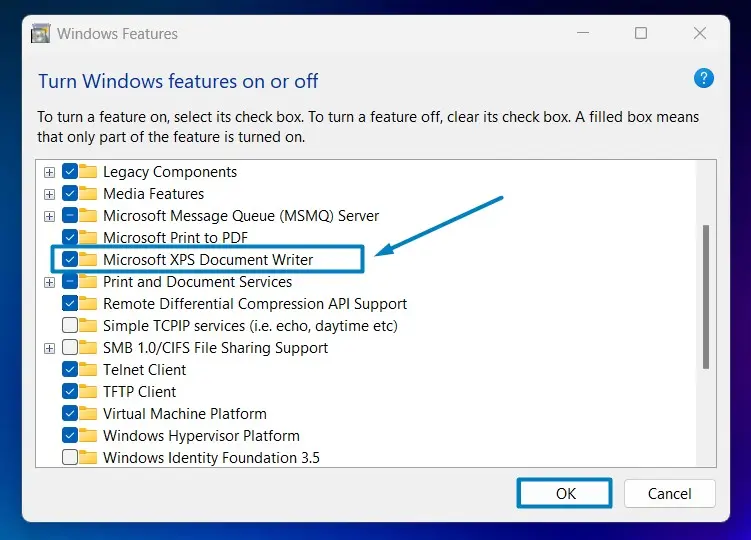
In Programs and Features, click on Turn Windows features on or off.
Choose Microsoft XPS DocumentWriter in the list of services.
Finally, click OK.
2. Create a new template or form
Try creating a new template or form when printing or saving as a PDF:
Create a new template for your form. If you need more guidance, there are resources available to help with template creation.
Change the template for your transaction.
Create your .PDF file.
3. Update the Print Spooler service properties
After that, you may need to ensure the Print Spooler service is functioning properly. Here’s how:
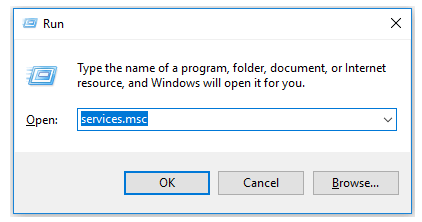
Open the WindowsStart menu.
Type Run in the search and press Enter.
Now, type Services.msc, and click OK.
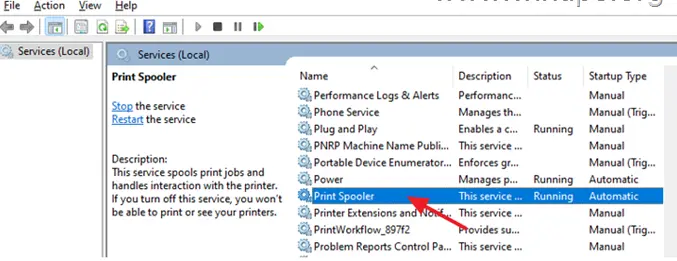
From the list of services, choose Print Spooler.
Right-click on Print Spooler and choose Properties.
In the Startup type section, set it to Automatic.
Select Apply, then click OK.
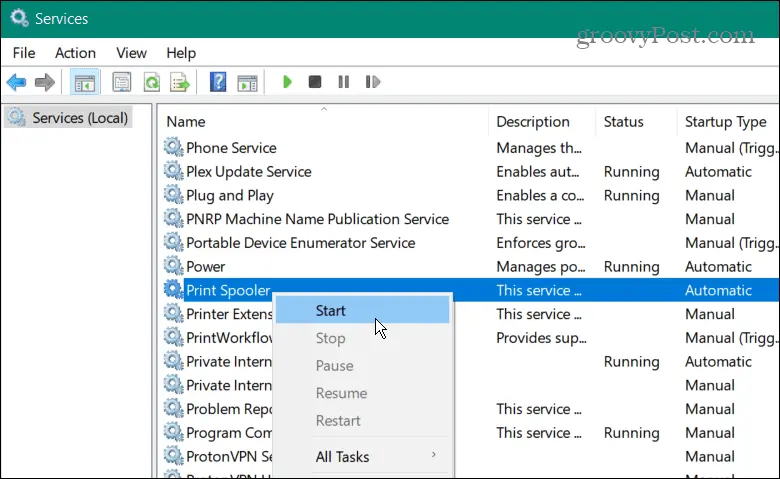
Finally, right-click the Print Spooler service again, then click Start to restart it.
When this is done, you will be able to save or email your PDF without any issues.
The reconcile window disappears or doesn’t show
If QuickBooks freezes after selecting “Reconcile” from the Banking menu, but the PDF functions still work, it’s possible the reconcile window is off-screen.
If the problem continues, you may need to contact your IT support or call the toll-free number for assistance.
Check all open windows to see if the reconcile window is listed.
Click Close All and then try the reconciliation again.
If the error persists during the reconciliation process, refer to resources for help with unrecoverable errors.
Test, reinstall, and adjust permissions for XPS Document Writer
Note: These steps apply to Windows, but not Terminal Services.
If you’re unable to print to the XPS printer outside of QuickBooks, you’ll need to reach out to your IT support or Microsoft for assistance.
Here are a few things you can try with the help of an IT professional:
Ensure XPS services are enabled:
Press Windows + R on your keyboard to open the Run command.
Type optionalfeatures in the Run field and click OK.
Locate Microsoft XPS Document Writer and ensure it’s checked.
Click OK.
Test the XPS Document Writer.
Try printing with the XPS Document Writer outside of QuickBooks to confirm it’s working.
Review security software settings:
Security software like Norton Antivirus or McAfee Firewall might block the creation of .xps files. Check your security settings to ensure these files aren’t being blocked.
Adjust Windows user permissions for the XPS Document Writer:
If a user lacks permission to print to the XPS Document Writer, QuickBooks may not be able to convert the file to a PDF. You may need to sign in with admin rights to update these permissions.
Conclusion
The QuickBooks Print and PDF Repair tool plays a vital role in resolving common printing and PDF-related errors that can disrupt your workflow. This blog has walked you through how the tool helps fix issues like missing PDFs, print failures, and component errors, ensuring smooth and efficient document handling within QuickBooks.
If you continue to experience problems even after using the Print and PDF Repair tool, it’s best to seek professional guidance. Connect with a certified QuickBooks ProAdvisor at (866) 500-0076 to get accurate solutions and keep your accounting processes running without interruptions.
Frequently Asked Questions
How do I repair a PDF in QuickBooks Tool Hub?
To repair PDF issues in QuickBooks Desktop (such as printing, saving, or emailing PDFs), use the QuickBooks Print & PDF Repair Tool within the QuickBooks Tool Hub. Start by closing QuickBooks, opening the Tool Hub, navigating to the Program Problems tab, and selecting the repair tool.
How can I repair a damaged PDF file?
To repair a damaged PDF in QuickBooks, run the QuickBooks PDF & Print Repair Tool within the QuickBooks Tool Hub. If issues persist, update your printer driver, check the Temp folder permissions, or repair the QuickBooks installation via the Windows Control Panel.
How to get QuickBooks desktop to print to PDF?
To print to PDF in QuickBooks Desktop, select File > Print and choose Microsoft Print to PDF or QuickBooks PDF Converter. If this fails, fix issues by using the QuickBooks Tool Hub’s PDF & Print Repair Tool, checking temp folder permissions, or ensuring the Microsoft XPS Document Writer is enabled in Windows.
What is the QuickBooks Print and PDF Repair tool?
The QuickBooks Print and PDF Repair Tool is a free diagnostic utility in the QuickBooks Tool Hub that automatically resolves issues preventing users from printing, emailing, or saving documents as PDFs in QuickBooks Desktop. It fixes broken Windows components, such as the XPS Document Writer and MSXML, which are necessary for QuickBooks functionality.
About The Author
Lana Creston is an experienced technical and accounting writer with a total of 9 years of experience. She currently works on QuickBooks accounting and technical guides at QuickBookSupportNet. Lana has a passion for reading and writing about various technical topics, especially exploring new accounting methods and software, while continuously expanding her expertise in the ever-evolving field of finance and technology.
Effortlessly handle data tasks or get expert assistance with:
Data Automation
Conversion & Migration
Integration
Tax Filing & Compliance
QuickBooks Desktop 2023 is ending — Upgrade QuickBooks Desktop 2023 to 2024 for continued performance and support.