Move Your QuickBooks Data Using the QuickBooks Migration Tool 

Home > Blogs > Move Your QuickBooks Data Using the QuickBooks Migration Tool 
  • Oct 15, 2025   |
  •   |
  • Estimated Read Time : 5 MIN

You made a smart move to visit this page before you would have moved your data from QuickBooks Desktop to QuickBooks Online. This is not a simple process as it sounds; it requires critical attention and accurate knowledge of what type of data you can use and what data are not supported to move.

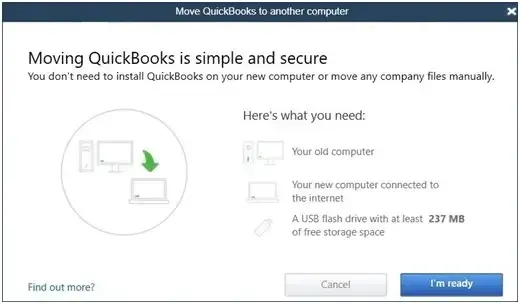
Move Quickbooks to another computer

You could spend hours to days moving your data from QuickBooks Desktop to Online. For your knowledge, the QuickBooks migration tool is a utility from Intuit to transfer data between different QuickBooks platforms. For example, transferring QuickBooks data from a desktop to online or from one PC to another PC. 

This guide has covered everything that any QuickBooks user requires to know how the QuickBooks migrator tool works and how to move QuickBooks Data from one platform to another.  

Learn to use the QuickBooks Migrator Tool and move your QuickBooks Data

Step 1: Ensure that your company file size is not too big to export

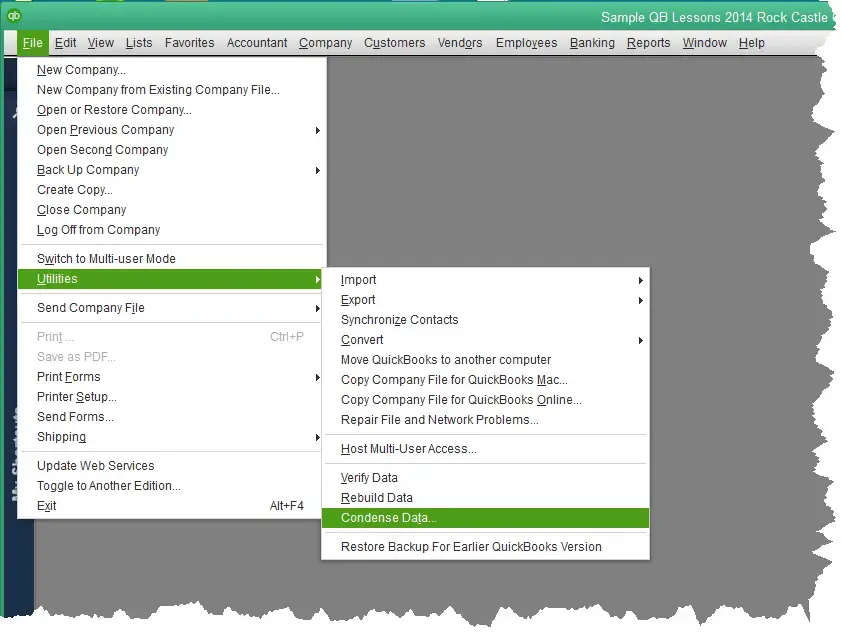
  • You need to condense your data using the Condense Data utility, which helps you to streamline your company data files. 
click Condense Data
  • When you want to migrate your data, use the Lists and Balances option. 
  • Enter your opening balances manually in your new QuickBooks Online file. 

Read More – QuickBooks Migration Failed Unexpectedly

Step 2: Make your desktop files ready

  • Use the updated QuickBooks application.
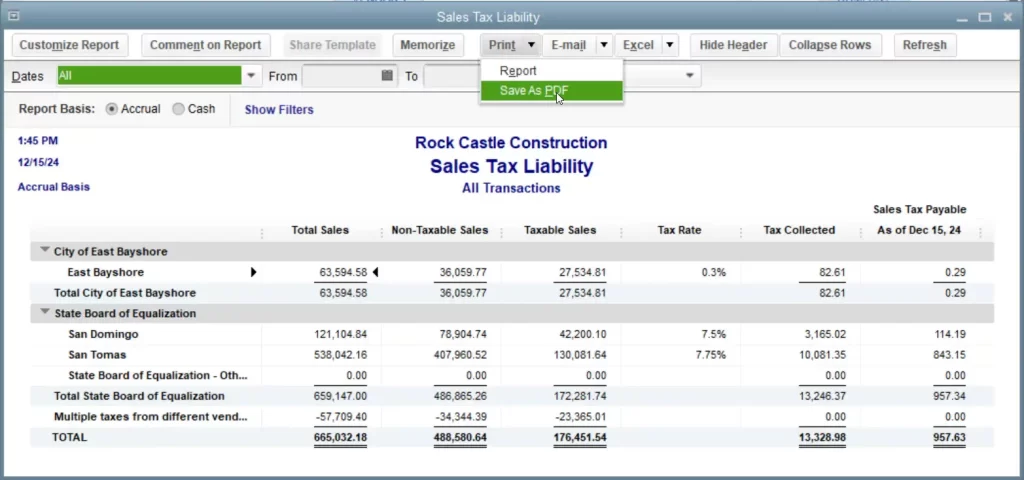
  • Get yourself a printout or a copy of your sales tax liability report. To do so, use the steps below:
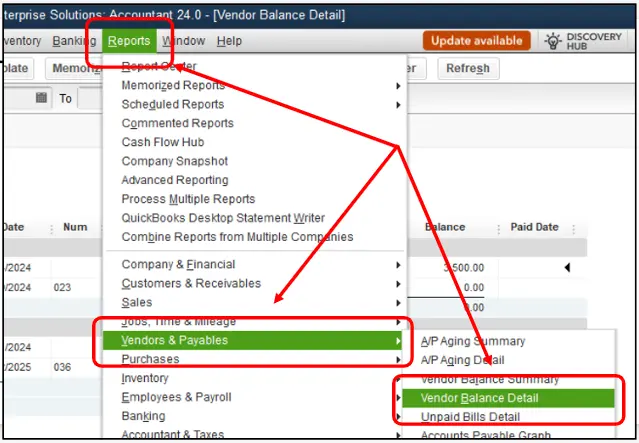
  • Click on Reports and choose Vendor & Payables.
choose Vendor & Payables
  • Click on Sales Tax Liability.
  • Select all from the Dates drop-down.
  • Click on Save as PDF from the Print drop-down.
Click on Save as PDF
  • Select the folder to save the file and click on Save.
  • In case you use online banking or import bank transactions
    • Categorize the transaction and reconcile bank and credit card statements. 
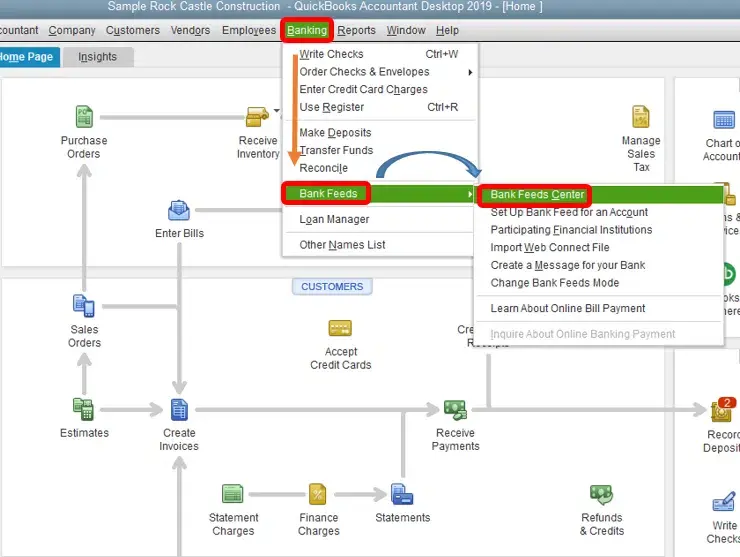
    • Click on Banking and choose Bank Feeds > Bank Feeds Center.
import bank transactions
  • Using QuickBooks Desktop Payroll: 
    • If you have not paid any of your employees, you can terminate or deactivate those employees.
    • Ensure you have all the employees’ profiles with up-to-date information available. 
    • After you have run the payroll process, wait for 2-3 days. This would pave the way to smoothly transfer all your paycheck information to QuickBooks Online. Before the next payroll, you can move your data. 

Note:- Ensure to move your data a few days earlier before your next payroll process.  

  • Using QuickBooks Desktop payments?  
  • You need admin-level permissions to move your QuickBooks payments subscription to Online on your QuickBooks Desktop Intuit account.  
  • If you are also using QuickBooks Time, contact our senior QuickBooks Time expert at +1(866)500-0076.  

Learn More – Move QuickBooks to a New Computer

Step 3: Transfer the QuickBooks Desktop file to QuickBooks Online

  • On your QuickBooks Desktop, sign in as an admin.
  • You can export a QuickBooks Desktop company.  
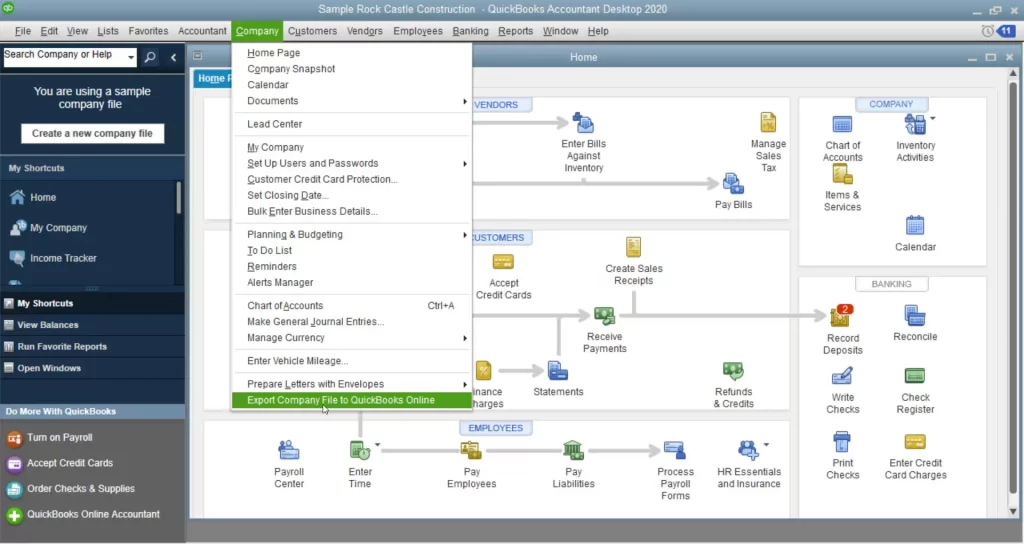
    • Click on Company and select Move to QuickBooks Online.
    • Click on Export your Company File to QuickBooks Online.
Transfer QuickBooks Desktop file to QuickBooks Online
  • Press Ctrl + 1 and open the Product information window
  • Press Ctrl + B + Q and click on OK.
  • Click on Get Started
  • On your screen, you would see “Let’s bring your data to QuickBooks Online”. You can choose how you want to move your data:
    • Bring all your company data.
    • Only Lists and Balances.
    • If you have inventory, choose any:
    • Click on Yes, track inventory using FIFO, and choose a starting date.
    • Choose No, don’t move inventory. You would like to manually move your inventory. Inventory items would be listed as non-inventory items.
  • Click on the home currency if you are using multi-currency in the QuickBooks Desktop version.
  • You would be asked if you are using a QuickBooks Online account.
  • Click on Yes, sign me in if you do have a QuickBooks online account, and click on Continue

Note:- This is the account that you created in Step 1.

  • In case you do not have an account on QuickBooks Online, select No, I need to create one. Once you do so, this will create a QuickBooks Online advanced trial company. We recommend that you contact our senior QuickBooks specialist at +1(866)500-0076 to purchase the right plan for you before you move your data.  
  • Log in with your QuickBooks Online credentials.
  • On your screen, you would have your QuickBooks Online company names and subscriptions listed. Now, choose the company where you want to move your data.
  • Click on Continue and click on Export. You can check the progress of the movement of your data via the progress bar.

Note:- In case your QuickBooks online account already has data, QuickBooks would ask you to replace your existing data. We would like you to be careful since this move of yours would be irreversible, and your data would be permanently deleted. If you would like to replace existing data:

  • Click on Agree > Replace.
  • Click on Yes, go ahead and replace the data > Replace.

Consider these two situations:

  • If you have QuickBooks Desktop 2021 or older.
  • You have no access to QuickBooks Desktop.

Launch the Online tool 

  • If you are using any of the below QuickBooks versions, click on it: 
  • You can convert a QuickBooks Mac file to QuickBooks for Windows.  
  • Click on Get Started.
  • Sign in to your Intuit Account.
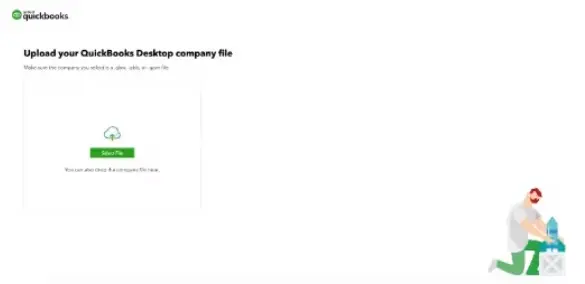
  • Upload the company file
  • Click on Select File.
  • Browse the file in QuickBooks Desktop that you would like to move. 
Upload the company file
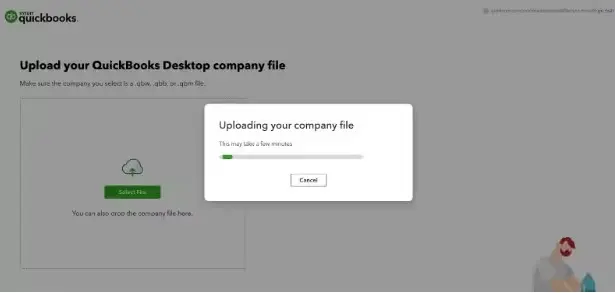
  • Click on Open and upload the company file. 
  • Use the drag-and-drop method to upload your QuickBooks Desktop.  
Upload the company file
  • Once the file is uploaded, it will be set to auto-update to the latest version of QuickBooks Desktop.
Upload the company file
  • Click on Get Started.

Step 4: Get yourself ready to use QuickBooks Online

You can get personalized help for QuickBooks, dial +1(866)500-0076.

Conclusion

Moving QuickBooks Data using the QuickBooks migrator tool has made it easy for us to quickly switch to the more advanced and user-friendly version of QuickBooks. 

If you are looking for more information or any help to move your QuickBooks data, dial us at +1(866)500-0076.

Frequently Asked Questions

What are the limitations of moving your data from QuickBooks Online to QuickBooks Desktop? 

There are certain limitations that would not allow you to convert QuickBooks Online to QuickBooks Desktop. It includes general items in QuickBooks Desktop: Customer type, vendor type, job type, memorized reports, payroll item, Sales rep, Price level, etc. 

How can I use the QuickBooks Migration Tool?

To get complete details on the QuickBooks migration tool usage, click on: https://www.quickbooksupportnet.com/transfer-quickbooks-desktop-to-another-computer/

How is the New migration tool different from the previous migration tool?

The new migration tool is designed to support multiple browsers, but has the same limitation as the old one. 

Is there any third-party app recommended by Intuit to save my data?

No, Intuit does not recommend any third-party app where you could save your data. 

Where can I contact if I want to outsource the migration of my QuickBooks data safely?

If you are looking to outsource the migration of your data, contact our senior QuickBooks specialist at +1(866)500-0076.