In Windows, file folders store and organize company files on your computer. To host a QuickBooks company file over a network, you need to configure proper access permissions to ensure data security, control modifications, and manage user privileges effectively. These permissions utilize Access Control Lists (ACLs) to assign specific rights—such as read, write, or full control—to users and groups, safeguarding resources from unauthorized access and maintaining data integrity.
This guide provides detailed steps to help you set up folder and Windows access permissions in QuickBooks, enabling secure file sharing and seamless collaboration without issues.
Setting Up the Folder and Windows Access Permissions for QuickBooks Files
Sharing a company file on the cloud requires both folder permissions and Windows. The steps below will walk you through how to set up folder and Windows access permissions in QuickBooks:
1. Set up folder permissions
Configure or change folder permissions to seamlessly share company files over the network by following these steps:
a. Verify the permissions are set correctly
- Open the Windows Start menu.
- Search for File Explorer and press Enter.
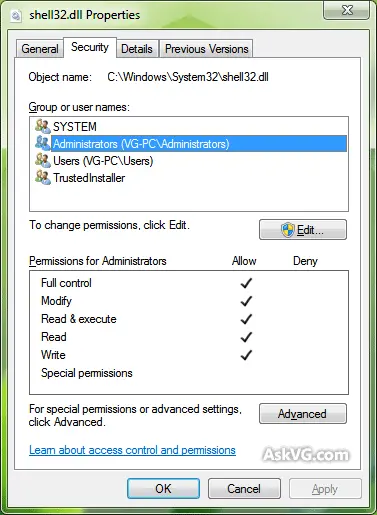
- Right-click on the file folder and select Properties.

- Select Advanced from the Security tab.
- Choose QBDataServiceUserXX > Edit.
- Set following settings to Allowed:
- Traverse Folder/Execute File
- List Folder/Read Data
- Read Attributes
- Read Extended Attributes
- Create Files/Write Data
- Create Folders/Append Data
- Write Attributes
- Write Extended Attributes
- Read Permissions
If the permissions aren’t configured correctly:
- Right-click on the company file folder> Properties.
- Go to the Security tab.
- Click on Edit.
- Choose QBDataServiceUserXX, then select Full Control > Allow.
- Select Apply > OK.
Read More – Windows Firewall is Blocking QuickBooks Desktop
b. Change folder permissions
If permissions are incorrect and needs to adjust
- Launch the Windows Start menu.
- In the Windows search, type File Explorer > Enter.
- Find the folders below and right-click on each:
- C:\Program Data\Intuit\Entitlement Client\v8
- C:\Program Data\Intuit\Entitlement Client\v6.0
- C:\Program Data\Intuit\Entitlement Client\v5
- C:\Program Data\Intuit\Entitlement Client\v3
- C:\Program Data\Intuit\Entitlement Client
- C:\Program Data\Intuit\QuickBooks Enterprise Solutions X.0 (X = version) or C:\Program Data\Intuit\QuickBooks 20XX (XX = year)
- C:\Program Data\COMMON FILES\INTUIT
- C:\Program Data\COMMON FILES\INTUIT\QUICKBOOKS
- C:\Users\Public\Public Documents\Intuit\QuickBooks\FAMXX (XX = year)
- C:\Users\Public\Public Documents\Intuit\QuickBooks\Company Files
- C:\Users\Public\Public Documents\Intuit\QuickBooks\Sample Company Files\QuickBooks Enterprise Solutions X.0 (X = version) or C:\Users\Public\Public Documents\Intuit\QuickBooks\Sample Company Files\QuickBooks 20XX (XX = year)
Perform the steps below for these folders. Remember that you might not have each of the folders, as some are version-specific.
- Right-click the folder.
- Select Properties.
- Go to Security > Everyone.
Note: If Everyone isn’t listed in the Group or User Name checkbox, click Add and type in Everyone > OK.
- Choose Full Control > Apply and OK.
2. Set Windows access permissions to share company files
Let’s set up Windows access permissions for a company file share on a multi-user network:
Windows 10
- Launch the Windows Start menu.
- In the search, type File Explorer> Enter.
- Right-click on the company file folder.
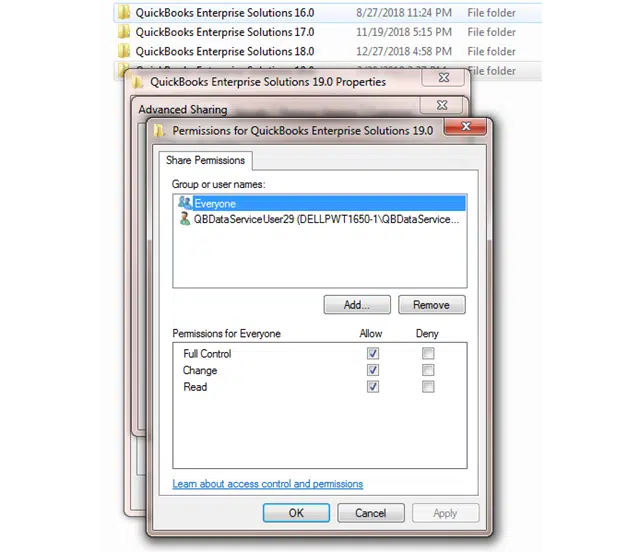
- Select Properties > Sharing > Share Add.
- Choose the corresponding QBDataServiceUserXX or your QB version.
- Set the permissions of both users to Full Control> Share.
Windows Server 2012
- Open the Windows Start menu. Type “Run” into the search and open the Run Command.
- Type in ServerManager and select OK.
- Select File and Storage Services then Shares.
- On the Task drop-down, choose New Share. A list of File Share Profile shows. You can learn about the differences between the profiles by clicking each profile and reading the description.
- Select SMB Share – Quick.
Note: SMB Share – Quick is the default profile. This selection can vary.
- From the Share location section, select Type a custom path then Browse to locate the folder you wish to share.
- Choose the appropriate folder and select Select a folder then Next.
Note: You may leave the default selections under the Configure Share settings window and select Next again.
Conclusion
To share your company file over a network and ensure seamless access for connected users, you must set up folder and Windows access permissions in QuickBooks. Following the steps outlined in this blog will help you configure these permissions correctly and prevent common multi-user errors caused by insufficient access rights.
For additional support or expert guidance, contact our QuickBooks professionals at +1(866)500-0076 today!
Frequently Asked Questions
How to set the access permissions to share company files for Windows 10?
To share the company files for Windows 10, open File Explorer, right-click on it> Properties> Sharing> Advanced Sharing, then click Permissions. Remove the “Everyone” group and add specific users or groups, assigning them appropriate permissions before clicking OK to apply the changes.
How do I fix administrative permissions error in QuickBooks?
To resolve the QuickBooks administrative rights, make sure the Windows user account has administrative rights. If you encounter an error when sharing the company file over the network, verify the Windows folder permissions for the company file location, grant “Full Control” to the QBDataServiceUserXX group, and enable hosting in QuickBooks.
Why it is necessary to set up the folder and windows access permissions?
Setting up folder and Windows access permissions ensures only authorized users can access specific files or folders and defines what actions they can perform, such as reading, modifying, or deleting data. This prevents unauthorized access, protects sensitive information, maintains data accuracy by limiting accidental changes, and helps comply with regulations.