Payroll updates are important to ensure that tax rates and tax calculations are correct and that payroll management is running smoothly. However, not updating payroll services can cause QuickBooks error PS077 to appear, accompanied by a warning message that says,
“Error PS077 When Downloading Payroll Updates”
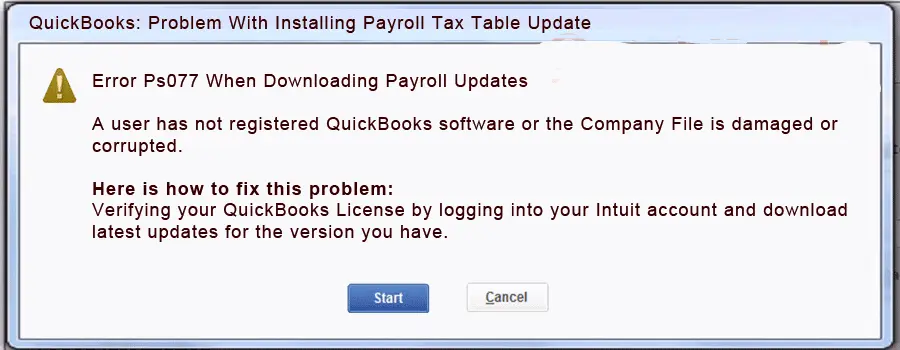
This error is one of the PSXXX series that appears due to failure of payroll update due to several reasons, like inactive payroll subscription, outdated QuickBooks, etc. In this detailed guide, we will discuss all the possible ways and different methods to deal with this error. Let’s read this guide carefully…
Why Do I See Payroll Update Error PS077 in QuickBooks?
You may see the update error PS077 in QuickBooks Desktop due to several factors, which we are discussing one by one in the section below:
- Inactive QuickBooks payroll subscription
- QuickBooks might not be registered to receive the updates
- The payroll tax table is not up-to-date
- Windows Defender on your computer might be blocking QuickBooks and the related operations
- Background processes lingering with the QB process, such as payroll update
- The QB installation might be corrupted, or the program files are damaged
- User Account Control settings might be blocking payroll updates
Top Methods to Fix QuickBooks Error PS077 When Updating Payroll
In this section, we will discuss various methods for resolving QuickBooks error PS077 when downloading payroll updates. After finding out the root cause, proceed to the solutions below and resolve the error immediately:
1. Check your payroll service subscription
An active payroll subscription is required to receive payroll services updates. This ensures you have the latest tax tables and accurate tax calculations available:
- Exit all the company files and restart your computer.
- Launch QuickBooks Desktop.
- Navigate to Employees> My Payroll Service, then select Manage Service Key.
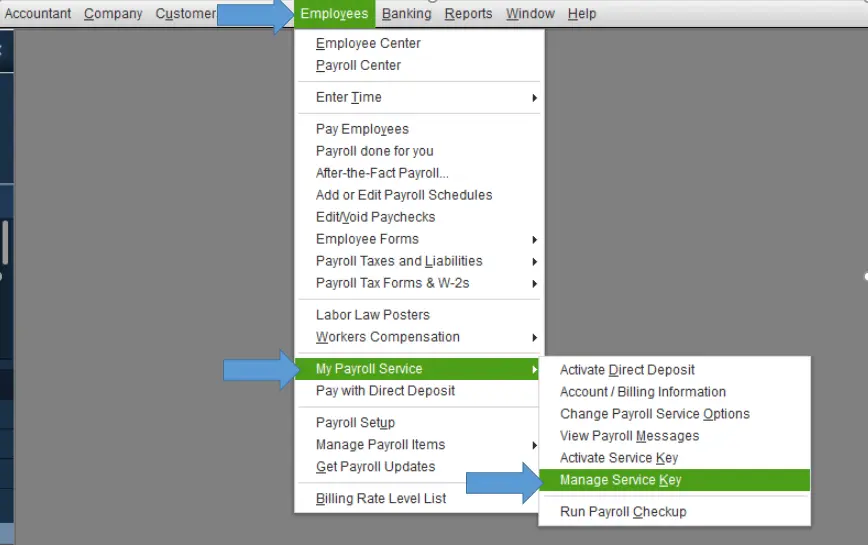
- Verify that the Service Name and Status are correct and will show as Active.
- Click on Edit and verify the service key number. If it’s incorrect, enter the service key.
- Select Next and remove the mark from the Open Payroll Setup box.
- Once done, select Finish.
- This will download the entire QB payroll update.
If you still encounter QuickBooks error PS077, proceed to the next step.
2. Register and update your QuickBooks Desktop
To receive the latest security and software improvement updates, you must ensure that the software is registered.
- On your keyboard, press F2 to open Product Information.
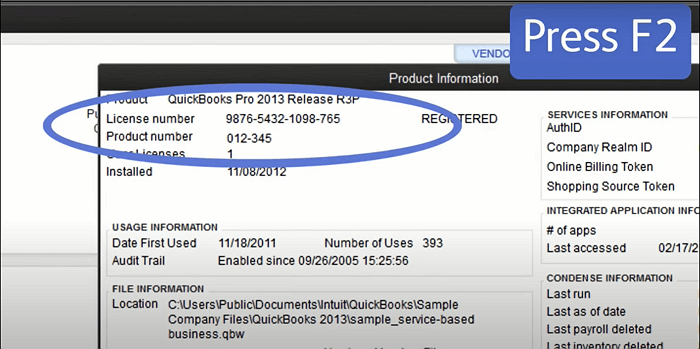
- Besides the license number, make sure it says Activated.
If it’s not activated, here’s how to register QuickBooks Desktop
- Open QuickBooks Desktop.
- Go to Help at the top.
- Select Activate QuickBooks Desktop.
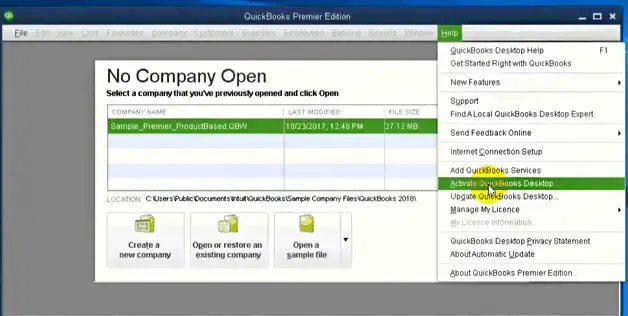
- Proceed with the on-screen steps to verify the information.
Update QuickBooks to the latest release
An outdated version of QuickBooks means the support services might be discontinued, and you may not receive the payroll updates or fail when trying to download, ultimately ending with a QuickBooks error PS077. Keep your QuickBooks Desktop to the latest release for the features and continued support.
Also, make sure to keep the payroll tax table up-to-date
- Navigate to Employees and select Get Payroll Updates.
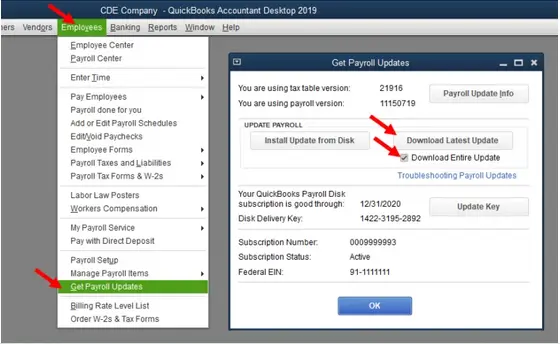
- To check the tax table version:
- See next to You are using tax table version: for the tax table version.
- Check the latest payroll news and updates to ensure it’s the correct version.
- For more details on your tax table version, click on Payroll Update Info.
- Get the latest tax table update:
- Hit on Download Entire Update.
- Choose Update. An informational window appears when the download is complete.
3. Add Defender exclusion and run Quick Fix my Program
To ensure it is not blocked, create a QuickBoks exception in Microsoft Defender, and you can run all QB operations without any hindrance:
a. Add Defender exclusions
To resolve this, QuickBooks Tool Hub now offers a feature to exclude specific QuickBooks files from Microsoft Defender scans. By adding these files to an exclusion list, Defender skips them during installation, ensuring updates proceed smoothly. Follow these steps to use this feature:
Note: You must be logged into Windows as an admin to add exclusions. If you’re not an admin, the Add Defender Exclusion option will be disabled, and you’ll need to request your admin to add the exclusion for you.
- Click Cancel to stop the update.
- Exit QB Desktop.
- Launch QuickBooks Tool Hub.
- Hit on Installation issues.
- Choose Add Defender Exclusion.
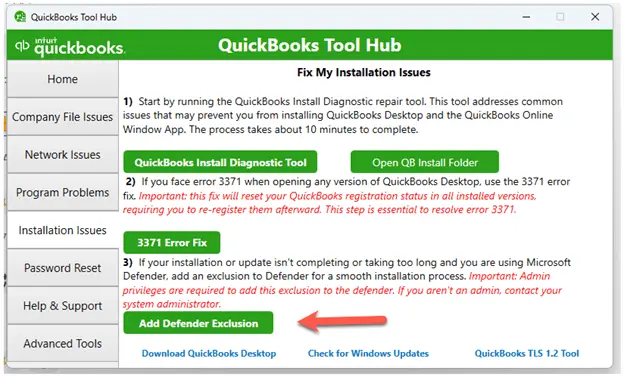
- Restart your computer.
- Open QuickBooks and start the update.
b. Run Quick Fix my Program
Note: You must download and install the latest release of QuickBooks Tool Hub (1.6.0.8) available. For an enhanced experience, it is recommended that you use Tool Hub on Windows 10 (64-bit).
- Open the QuickBooks Tool Hub.
- In the left pane, select Program Problems.
- Hit on Quick Fix my Program.
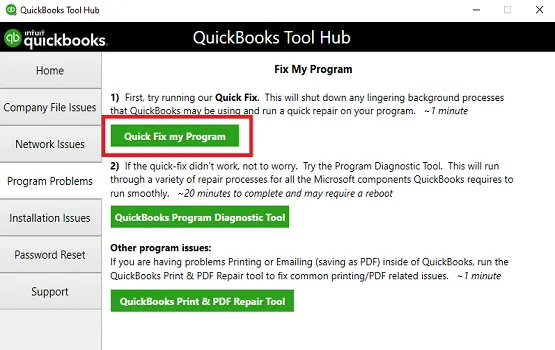
- Reopen QB Desktop and ensure it is up-to-date to the latest release.
4. Repair QuickBooks Desktop
If something went wrong during the installation or the files are damaged, it can cause problems when trying to use it. Run the QuickBooks Install Diagnostic Tool to repair QuickBooks Desktop:
- Launch the QuickBooks Tool Hub.
- Select Installation Issues from the left menu bar.
- Hit on QuickBooks Install Diagnostic Tool. Let the tool run for some time; it may take up to 20 minutes, then open the data file.
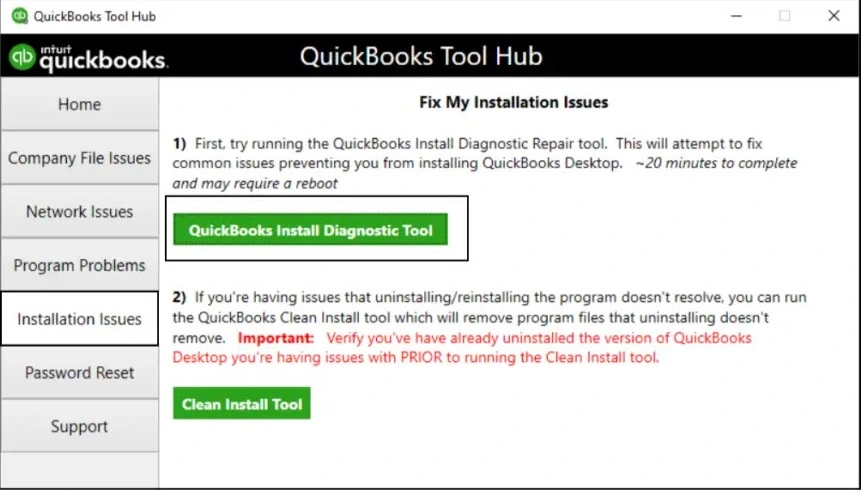
- Update to the latest version of QuickBooks to ensure you use the latest bug fixes and security updates.
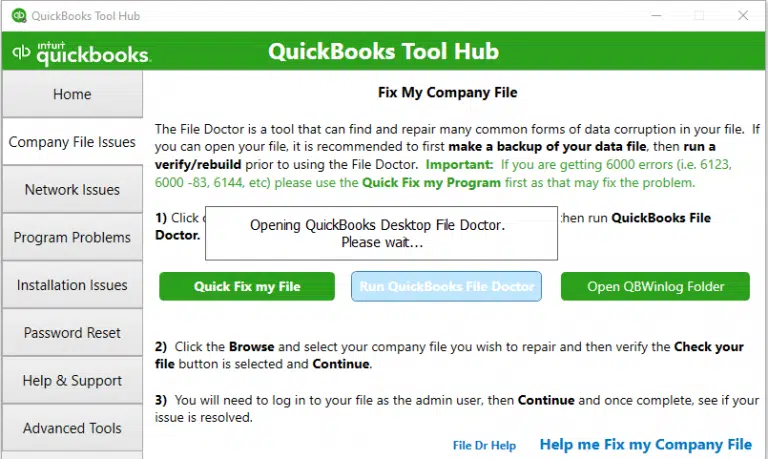
5. Run QuickBooks File Doctor
The QuickBooks File Doctor verifies the company file data for possible data damage and network connectivity issues and runs a quick repair on them. Let’s see how to run QB File Doctor in the Tool Hub:
- Select Company File Issues in the left pane of Tool Hub.
- Hit on Run QuickBooks File Doctor. It can take up to a minute or more for the QB File Doc to open.
Note: If the QuickBooks File Doctor doesn’t open, search in the Windows Search for QB Desktop File Doc and open it manually.
- Choose your company file from the drop-down menu in the QuickBooks File Doctor. If you don’t, click Browse to find the file.
- Select the middle option, check your file, then Continue.
- Enter the QuickBooks admin password to allow access and click Next.
The scan time usually depends on the size of the company file and can take up to 10-15 minutes. Even if the issues are fixed, the scan was successful. When the scan is complete, open QuickBooks and open the company file.
6. Clean Install QuickBooks Desktop
Clean installing QuickBooks Desktop involves removing the program files and folders, then getting a fresh QuickBooks installation. This fixes software errors, resolves bugs, and prevents corrupted program files by removing all QuickBooks installation components and then reinstalling the software from scratch. This type of installation eliminates pending system or registry files that may be causing glitches, ensuring a fresh start for the accounting program and improving overall performance.
7. Make changes to User Account Control settings
Modify the UAC settings in Windows 10 by following these steps:
| Note: Disabling UAC settings can be necessary when troubleshooting QuickBooks Desktop issues. We recommend that you turn it back on to prevent security risks on your computer. |
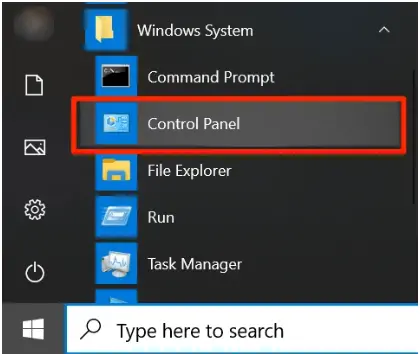
- Press the Windows+R keys to open the Run command.
- In the Run prompt, type Control Panel and click OK.
- Click on User Accounts and select User Accounts (Classic View).
- Choose Change user account control settings. (Note: When prompted by UAC, click Yes to continue).
- Move the slider:
- Set it to Never Notify and click OK to turn off UAC
- Set it to Always Notify and click OK to run on UAC (Note: When prompted by UAC, click Yes to continue).
- Finally, restart your computer.
Conclusion
So, you must have reviewed the information above, the different reasons why you see QuickBooks error PS077, and the troubleshooting steps to get past the error. We hope the information has been helpful for you, and you are good to go with QuickBooks Payroll.
However, if you still failed to update QuickBooks payroll and are wondering what to do, you must get in touch with QuickBooks professionals at +1(866)500-0076. Talk to an expert now!
Frequently Asked Questions
How to fix QuickBooks error PS077/PS032?
Download the most recent tax table and QuickBooks update, resolve corrupted files, repair the QuickBooks installation, verify and update your billing information in your Intuit account, and make sure your Windows operating system is current to fix QuickBooks error PS077/PS032.
Why am I getting a payroll error code in QuickBooks Desktop?
There could be multiple reasons why you might end up with a payroll error:
- Issues with the payroll subscription
- Incorrect settings
- Internet connection problems
- Outdated tax table or corrupted data file
- Windows Firewall or other security applications might be blocking
How do I fix service key error in QuickBooks?
To fix a QuickBooks service key error, update your payroll service key by going to Employees > My Payroll Service > Manage Service Key and verifying the key number and status, or try running the QuickBooks Tool Hub’s Quick Fix my Program tool to close background processes.
How to manually update QuickBooks payroll?
To manually update your QuickBooks payroll:
- In QuickBooks, go to Help> Update QuickBooks Desktop.
- Move to the Overview tab> Update Now.
- Once done, close QuickBooks, run the installation file, and then restart QuickBooks to install the update.
How do I resync payroll in QB?
Let’s resync your payroll data in QuickBooks:
- In the navigation list, select Exports.
- Choose your QuickBooks Desktop export in the list of available exports.
- Verify the current dates in the ‘Pay Period to Export‘ drop-down menu and make the required changes.
- Once done, select Synchronize.