Author: admin

Home > Articles by: admin

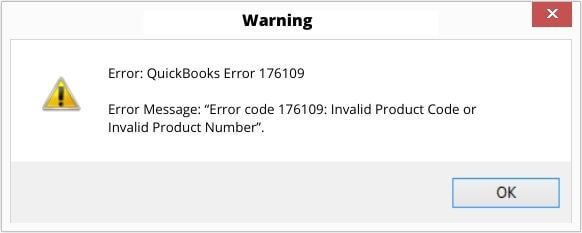
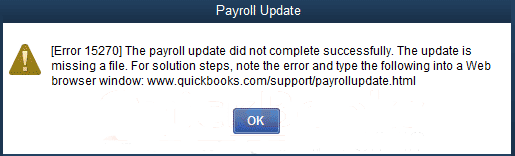
At times, the users might come across QuickBooks POS failed to open company file error while accessing the application. Wondering why it happened? It may happen due to damage or corruption in the QuickBooks company file. Every time the error occurs, any one of the following error messages comes into view:

“Failed to Open company Error: Unable to connect to your company data file”

Go through this whole post attentively, and you will come to know the root causes of the error and how to overcome it.

Are you facing difficulty while accomplishing your task due to QuickBooks POS failed to open company file error? Don’t worry, and connect with our professionals at @+1855-603-0490 to get immediate assistance.

Top Reasons Why QuickBooks POS Failed to Open Company File Error Occur

At times, the users might confront QuickBooks POS failed to open a company file error because of accessing an obsolete version of the QBDT application. The complete list of reasons that may evoke this error is as follows:

  • Sometimes, it may occur when the users install the Point of Sale application on the client workstation instead of a server.
  • It may also occur due to the damage in the company file.
  • You might have experienced that the connection with your QuickBooks data file has failed.
  • Also, it may trigger when the POS Database service manager isn’t running, and you cannot access your data file.
  • In other instances, it may occur when you see that by accessing Windows XP SP2 operating system, you have converted the data file into a higher version of POS.

Also Read – Fix QuickBooks Desktop Error 15107

Key Points You Know Before Fixing “QuickBooks POS Failed To Open Company File” Error

Here are the tips that the users must know before diving towards the troubleshooting part. This will help you eliminate the error seamlessly.

Relaunch Your System:-

Relaunching your computer device refreshes your operating system and will remove all the changes saved. Doing so will help if you encounter an issue due to recent changes.

Use the Windows Admin Credentials To Sign In to your Account:-

Whenever you sign in to your device with admin credentials, it will grab you some extra permissions. Also, it allows you to make changes within the system configuration and control it. 

What should be done when QuickBooks Point of Sale Won’t Open Company File?

You can easily configure QuickBooks POS failed to open company file error using the below-listed resolution methods. 

Process # 1. Relaunch Your QuickBooks POS Services 

Relaunching the QuickBooks Point of Sale will delete all the saved information from the application by refreshing it. Therefore, to refresh the application, apply the steps listed below. 

  1. To begin the process, exit from the QuickBooks Point Of Sale application if it’s already open.
  2. Press the Windows key and input “service.msc” within the search area. 
  3. Locate and then configure the Intuit Entitlement Service and QBPOS Database Manager.
    • In the first step, double-click on the Intuit Entitlement Service vX. 
    • Next, move to the General tab and select the Startup Type field as Automatic. Also, ensure that the service status represents Started. 
    • Following this, opt for the Log On tab and then choose the Local System Account > Allow service to interact with Desktop.
  4. For instance, if you wish to configure the IntuitEntitlement Service, only then move to the Recovery menu. Later on, opt for the highlighted Restart the Service from the First, Second, and Subsequent fields.
  5. Now, choose the Apply options and then hit OK.
  6. In the end, try running the company file and see whether the issue is resolved. 

Also Read – How to change Payroll schedule in QuickBooks desktop

Process # 2. Establish a Test Company File:-

Generating a test company file will help you identify whether the issue is with your application or your system itself. For instance, you need to reinstall the software if there is any issue with the entire application. Follow the step-by-step instructions to prepare a test company file:

  • Begin the process by opening the QuickBooks Point Of Sale application on your device.
  • Afterwards, pick Create New Company from the Start Company screen and then hit the Next option. 
  • Thereafter, input “Test” within the Company Name field and hit the Create option.
  • Next, you must run the test file, move to the File menu, and opt for Company operations. 
  • Furthermore, head towards the Open Existing company and look for your file. 

Process # 3: Recover a Backup Of the Company File 

If you come across the QuickBooks POS failing to open the company file issue, you must run the last backup generated for your data file. For that, you must implement the following steps in the same way as written below. 

  • The first and foremost step is to move to the QuickBooks File menu and then opt for Company Operations.
  • Next, choose Restore from backup > Next > Browse to alternate backup file > Browse. 
  • Now, from the left window, follow the path: “C: > Users > Public > Public Documents > Intuit > QuickBooks POS 18.0 > Data > Your Company Name > Backup”.
  • After this, you have to opt for the latest backup and then hit the Next option. Doing so, will recover your data file till the date and time when that backup was generated.

Also Read – Fix Trouble in Opening QuickBooks Payroll 2020

Winding Up!!

We hope you find this post relevant and helpful in figuring out the QuickBooks POS Failed to Open Company file error. If you still face problems while accessing your company file, drop an email to our experts, and they will provide the most effective solutions to rectify the issue immediately.

Payroll schedule in QuickBooks desktop are a way of ascertaining the duration after which employees need to be paid by the company. Grouping together employees according to their pay schedules becomes most crucial and can be done quite easily with QuickBooks. With such classification, processing your payrolls becomes much more efficient. In this blog, we are going to do an in-depth coverage of how payroll schedules can be created, changed and managed in QuickBooks online & desktop version.

Types of pay schedules that can be assigned in QuickBooks

  • Weekly: Doling out payouts every week, 52 times a year can be obtained on QuickBooks on any recurring day of the week, usually a Friday or a Saturday.
  • Bi-Weekly: This is giving out payouts every 2 weeks meaning 26 payouts in a year.
  • Semi-Monthly: Paying employees twice a month with one payment at the middle of the month and the other at the end. This would mean a total of 24 payouts in a year.
  • Monthly: This is the most common form of payment schedule in which the pay is given once a month, on any recurring day making it a total of 12 payouts in a year.

Setting up and updating pay schedules in QuickBooks Online Payroll

  • Go to Payroll and then choose Employees
  • Fill in the employee’s name
  • Choose the Edit employee option
  • From the drop-down menu, choose “How often do you pay[employee]?”.
  • Then choose the employee’s pay schedule
  • “Add new” for creating a new pay schedule.
  • Jot down the details in the appropriate fields
  • Click OK
  • Now choose Done

Read Also : QuickBooks payroll Update Error

Assigning and updating pay schedules in QuickBooks Desktop Payroll

Creating a schedule of payroll

  • Go to Employees menu
  • Now choose employee centre
  • Double-click on the employee’s name
  • Move on to Payroll Info tab
  • From the drop-down menu, choose the Payroll Schedule option.
  • Choose the type of payroll schedule that you want to assign
  • Click on OK to save

Updating a Pay Schedule

  • Choose Payroll Centre from the Employees menu
  • Pick the schedule you want to update from the Create Paychecks menu.
  • Go to Edit payroll Schedule and make the desired amends.
  • Click on Yes for updating schedules of all employees assigned to it.
  • Click on OK

Also Read – Fix QuickBooks Error Code 1646

Deactivating & Deleting a Pay Schedule

Getting a payroll schedule inactive instead of deleting it is a much better option because this allows you to activate it in the future without the hassle of setting up a new payroll schedule. In order to deactivate a payroll schedule stick to following steps-:

  • Visit employee centre by clicking on the Employees menu
  • From “Create Paychecks” table, pick the desired pay schedule
  • From the drop-down menu of payroll schedules, choose Edit Schedule
  • “Schedule is inactive” is to be marked
  • Click OK

Should you decide to completely delete a payroll, here are a couple of steps that can help you do just that-:

Step 1: Delete the name of employees who are on the to be deleted payroll schedule

  • Choose Payroll center from the Employees menu
  • Open the employee tab by double-clicking on the employee’s name
  • Now, move on to Payroll Info tab
  • Ensure that schedule in Payroll schedule is not the one that needs to be deleted. If that is the case, then choose another payroll schedule for the employee or leave the field blank.

Step 2: Delete the payroll schedule

  • From the employees menu, choose the Payroll Centre option
  • Click on Pay Employees tab
  • From the Create Paychecks tab, choose the payroll schedule that is to be deleted.
  • From the drop-down menu of Payroll Schedules, pick Delete Schedule.
  • If you get an error message saying that you can’t delete or make payroll schedule inactive, then it means that there are some names of employees that still exist. In that case, you need to follow step 1 and then Click OK.

Read More : QuickBooks payroll service

Conclusion-:

Although, we’ve tried to walk you through the troubleshooting process of QuickBooks and have given you an in-depth solution regarding Payroll schedule in QuickBooks desktop, a situation might arise when it still couldn’t fix the problem. In that case, feel free to get in touch with our expert professionals who are ready to solve all your queries regarding these issues. Chat with us or shoot us a mail at info@quickbooksupportnet.com, We’d be happy to help!

QuickBooks error 1406 is a technical issue in the program that occurs when performing a crucial task in the QuickBooks application. A conflicting application running in the background is one of the most apparent reasons behind this error.

When the error code crops up on your screen, you may not be able to accomplish an ongoing task in the program. There are several issues that can trigger this error in the QuickBooks application. To get rid of the QuickBooks error 1406, you need to fix all these reasons carefully. Let’s start!

Dealing with QuickBooks Desktop error 1406? Avail of the relevant assistance by dialing our helpline number +1855-603-0490.

What Is QuickBooks Error Message 1406?

QuickBooks error 1406 can take place due to multi-faceted reasons. When the error occurs, you will see an error message on your screen that states – 

Error 1406: Could not write value to key. 

In addition to this, the error message also tells you to verify if you have sufficient access to the key. When the error occurs, it can hamper your work progress. Therefore, you need to perform the right troubleshooting at the right time. 

Also Read – Troubleshoot QuickBooks Error C-224

Why do I see Error Code 1406 in QuickBooks? 

QuickBooks error code 1406 can take place due to several reasons. Some of the main reasons are explained in the below-given list: 

  • Corruption in the Windows registry is one of the main reasons behind this error. 
  • Other applications interfering with the QuickBooks program can also evoke the error.
  • When you are not logged in as an admin in Windows. 
  • If the download location of QuickBooks is not accessible. 
  • When multiple users try to download QuickBooks at the same time. 
  • A corrupt Windows installer is also one of the apparent reasons behind the error. 

What Are The Symptoms of QuickBooks Error 1406? 

When the QuickBooks error code 1406 occurs, you can determine it by the below-given symptoms:  

  • An error message, including the error code 1406, will appear on your screen. 
  • The system crashes now and then when performing a task. 
  • Sluggish performance of the system on mouse or keyboard inputs. 
  • The system shuts down all of a sudden while working in QuickBooks.

Also Read – Fix QuickBooks Error Code -6177, 0

How To Fix QuickBooks Error 1406? 

After discussing the causes and symptoms of the error, we can finally move to the troubleshooting solutions to eliminate the error code 1406 in QuickBooks. Follow the below-given steps: 

Solution 1: Disable Your Antivirus or Security Program Temporarily

The antivirus or security application running in the background can interfere with running QuickBooks processes, and therefore, you need to disable them temporarily. You can enable it once the task giving the error is fixed. The error can take place when you update your antivirus application. If this method doesn’t fix the QuickBooks error 1406, try the next method. 

Solution 2: Utilize QuickBooks Install Diagnostic Tool 

QuickBooks install diagnostic tool is devised by Intuit to diagnose the issues related to the program installation and troubleshoot them. 

  • Download and QuickBooks Tool Hub from Intuit and save the file on your Desktop.
  • Next, perform the on-screen instructions carefully to complete the installation.
  • Agree to the terms and conditions, and you are not ready to put the tool to use. 
  • When in QuickBooks Tool Hub, navigate through the list of options and select Installation Issues.
  • Here, you will get the option to run the QuickBooks Install Diagnostic Tool.
  • Run it and wait for it to scan and repair the common installation issues related to the program. 
  • Once done, check if the QuickBooks error code 1406 is fixed or not.

If the error persists, try the third troubleshooting solution of this post.

Also Read – Fix QuickBooks Error Code 1646

Solution 3: Repair The Damaged Registry To Fix Error Code 1406

A damaged Windows registry is one of the main reasons behind this error. To repair it:

  • Go to the Process tab and then press on the windows + R tabs together and open the Run window. 
  • After that, type in “Regedit” in the Run window.
  • Next, hit the enter tab, and it will open the registry editor window.
  • Now move to the path: HKEY_LOCAL_MACHINE\SYSTEM\CurrentControlSet\services\iaSTOR registry key.
  • Now conclude this process by repairing the registry.

Following these steps carefully, you can troubleshoot QuickBooks error 1406.

Solution 4: Update Windows To The Latest Release

If none of the above-described solutions fix the error, update your Windows to the latest release by following the steps described underneath:

  • First, go to the Windows Update screen and enter the Update tab.
  • Thereafter, click on the Windows Update icon to proceed further.
  • Next, click the “Check for Updates” option to see if an update is available.
  • If available, double-click the Windows update icon, and it will launch the Windows update window.
  • Here, you can go for the required update and download them with a single click.
  • After that, restart your computer and install the downloaded update on your computer.
  • When the startup screen appears, launch QuickBooks and check the status of QuickBooks error 1406.

Also see – Resolve The QuickBooks Error Code 2107

Ending Words!

The solutions discussed in this post can help you troubleshoot the QuickBooks error 1406. If you are having trouble performing these solutions or need professional assistance in error resolution, our experts can help. You can reach us by sending us an email or chatting with us. With the help of one-on-one assistance, you can get rid of QuickBooks error code 1406 with ease.

QuickBooks error 2107 is related to the salaries or direct deposit payment mode in the program. The error often occurs when processing the employee’s salaries directly to their accounts. QuickBooks Desktop Payroll is definitely one of the most efficient accounting applications for keeping track of the employee’s payroll and making their payments. 

However, when the QuickBooks error code 2107 takes place, you may not be able to transfer employees’ salaries using the Direct Deposit method. Moreover, the error can also occur when downloading payroll in the system. To resolve this error, you need to explore its possible reasons. Let’s follow this post to gain insight into the error code 2107 in QuickBooks.

What is QuickBooks Error 2107?

QuickBooks error message 2107 can take place when making employee payments. When the error occurs, you will see a warning message with the below-given text:

Error 2107: QuickBooks has encountered a problem and needs to close. We are sorry for the inconvenience. 

QuickBooks Error 2107 (Message)

Improper installation of the QuickBooks Desktop application is one of the main reasons behind this error. In addition, there are some other possible reasons as well. Once the error is identified, you need to suppress the possible factors that can promote the error code 2107 by implementing the trial and error methods discussed in this post.

Also Read – Fix QuickBooks error 3371 status code 11118

What Are The Possible Reasons That Can Cause QuickBooks 2107?

The below-given list describes some of the main reasons behind the error code 2107 in QuickBooks:

  • When the installation of the QuickBooks application gets hindered or corrupted.
  • A virus attack on the system can also promote the error code 2107.
  • Accidental deletion of important QuickBooks-related files.
  • Corruption in the Windows registry due to erroneous changes within the products.
  • Make sure that you are not installing a corrupted version of QuickBooks.

Symptoms of QuickBooks Desktop Error 2107

After discussing the possible reasons behind the QuickBooks ERROR 2107, let’s discuss the symptoms of the QuickBooks error code 2107:

  • A warning message with the error code 2107 will show up on your screen. 
  • The system’s Window will respond sluggishly when provided with the mouse or keyboard inputs.
  • System freezes for a few seconds on the arrival of the error code 2107 in QuickBooks.
  • The system crashes every time you try to run QuickBooks on it.
  • Inappropriate settings of your personal Firewall or Internet security settings.

Also Read – Solve QuickBooks Error 80029c4a

How To Troubleshoot QuickBooks Error Message Code 2107?

The above-explained sections give crucial insight into the QuickBooks error 2107 and can also play a vital role in the error resolution. Now, we can move ahead and discuss some effective solutions to override the error code 2107:

Solution 1: Put System File Checker To Use Via Command Prompt

To utilize the system file, check using Command Prompt:

  • Click the Start button in the first place, and when the search box opens, type Command into this box.
  • Thereafter, click and hold the CTRL + Shift keys simultaneously.
  • When a permission box opens up on your screen, click the Enter button.
  • Next, you will see a black screen with a blinking cursor.
  • Type Sfc/scannow using the cursor and click the Enter button.
  • After completing this step, the System File Checker will start scanning for the QuickBooks error code 2107.
  • Now perform the on-screen instructions to accomplish the procedure.

Solution 2: Check If A New Windows Update Is Available

An outdated Windows OS is one of the strong reasons behind the arrival of the QuickBooks solution error 2107. Therefore, look for the latest Windows updates and download them if available. Below are the steps:

  • In the first place, hit the Start button to initiate the procedure.
  • Now type Update in the search area and click Enter key.
  • When in the Windows Update dialogue box, check if an update is available or not.
  • If available, choose the Install updates option and follow the on-screen prompts to finish the procedure.

Also Read – Fix QuickBooks Error Code -6177, 0

Solution 3: Repair Windows Registry Manually

A damaged Windows Registry is also one of the various reasons behind the QuickBooks fix error 2107. To repair it:

  • Tap the Start button, and in the search area, type Command.
  • Also, press the CTRL + Shift keys at the same time.
  • It will open a permission dialogue box wherein you need to hit the Enter key.
  • Next, you will see a black box with a blinking cursor wherein you need to type “Regedit” and click Enter button.
  • To move back to the registry editor, choose the error 2107 related key.
  • After that, click the Export button from within the File menu.
  • Now in the “Save in” list, choose a suitable folder to save the QuickBooks backup key. While saving, name your backup file in the file name box.
  • Make sure that the “Selected Branch” option is chosen in the Export Range box.
  • After confirming it, save the files.
  • In the end, you need to save the file with a .reg file domain and create a backup of the QuickBooks-related register entry.

Ending Words! 

After executing the steps discussed in this post, you can get rid of the QuickBooks error 2107 with the utmost ease. However, if you are stuck with a complex step or procedure and need help, get in touch with us. You may dial our helpline number or send us an email with the error description to get a callback.

QuickBooks Error 15243 is the common error code of series 15XXX that generally arises when the user tries to update the payroll services to the latest release. These payroll services allow the business to file taxes, manage employee benefits, and pay salaries to employees. Error code 15243 usually occurs when the QuickBooks File Copy Service (FCS) is damaged or corrupted. 

Error code 15243 arises with a pop-up display message as: 

“QuickBooks Error Code 15243: QuickBooks fails to update the payroll to the latest release. The QuickBooks FCS service is corrupted or damaged.”

QuickBooks Error 15243 (Error Message)

Factors Leading to QuickBooks Error 15243

Let’s discover the possible reasons a user may encounter the QuickBooks payroll update error 15243;

  • The QuickBooks File Copy Service (FCS) is either damaged or missing from the system.
  • QuickBooks payroll new updates have not been installed properly.
  • Background active antivirus software is disabling the QuickBooks to access the downloaded file.
  • Damaged or corrupted PC’s windows registry.
  • A poor internet connection can also be a reason why the error code 15243 arises. 
  • QuickBooks file is mistakenly deleted from the system.
  • Using an inactive payroll subscription. 

Symptoms of QuickBooks Error 15243 (Payroll Update Error)

Check out the symptoms through which you can easily identify the QuickBooks payroll update error 15243;

Crucial Things to Do Before Troubleshooting Error Code 15243

Before you directly jump onto the solutions, let’s take a look at some of the important steps that we strongly suggest you follow;

(1) Creating a Backup of QuickBooks Company’s File

While troubleshooting, if any step goes beyond the desired results, then having a backup company’s file can help you prevent the loss of important data.

Below are the steps you can follow to create a backup of the QuickBooks company’s file.

  • First of all, launch the QuickBooks desktop application on your PC. 
  • Thereon, navigate to the “File” menu settings and click on the “Back Up Company” option.
  • Moving ahead, you have to click on the “Create Local Backup” option.
  • Now, keep following the on-screen instructions to complete the updating process.

(2) Update QuickBooks Desktop Application

Below are the steps you can execute to update the QuickBooks desktop application to the latest release version. 

  • First, press and hold the Ctrl key on your keyboard and then double-click on the QuickBooks desktop application to open it. 
  • Then, navigate to the “Help” menu settings and click on the “Update QuickBooks Desktop” option. 
  • Now, the updates window will be open on your screen. Here, you have to click on the “Update Now” option. 
  • Moving ahead, click on the “Get Updates” option. 
  • Now, the updating process will commence on your screen. 
  • A QuickBooks updating message will appear on the screen as the process ends.
  • At last, click on the “Close” option. 

Also Read – QuickBooks Error 15222

Solutions to Resolve QuickBooks Payroll Update Error 15243

Let’s check out the solutions that you can follow to resolve the QuickBooks payroll update error 15243;

Solution 1. Add Intuit as a Trusted Website in Internet Explorer Settings

The first recommended solution that you can follow to eliminate QuickBooks payroll update error 15243 is adding Intuit as a trusted website in Internet Explorer. Here are the steps that you can follow to get the task done;

  • Firstly, launch the Internet Explorer web browser on your device. 
  • Click on the “Gear” icon and select the “Internet” option. 
  • After that, switch to the “Security” tab and click on the “Trusted Sites” option. 
  • Now, a trusted sites pop-up window will be open on your screen.
  • Click on the address bar option here and provide the QuickBooks website URL in the insert fields. 
  • For US, type “.Intuit.com” and “.quickbooks.com.”  For Canada, type “.quickbooks.ca” and “.inituit.ca.” 
  • After providing the website details, click on the “Close” option.
  • At last, end this process by clicking on the “Apply” option and “OK” option.

Once you have successfully added Intuit as a trusted website in the Internet Explorer settings, then verify if you can update the QuickBooks payroll services to the latest release or not. If the error still exists, then move to the second solution.

Solution 2. Turn On QuickBooks Desktop File Copy Service (FCS)

When the QuickBooks File Copy Service (FCS) is disabled, it can be one of the possible reasons due to why a user may face QuickBooks Payroll update error 15243. In that scenario, the error can be fixed by turning on the QuickBooks FCS.
 
Here are the steps that you can execute to enable QuickBooks File Copy Service;

  • The first step is to open the windows run command on your PC and then type “COMPMGMT.MSC” in the search box.
  • After that, click on the “OK” option and then the Computer Management Window will be open on your screen.
  • You must click on the “Services and Applications” option.
  • Moving ahead, click on the “Services” option. 
  • After that, scroll down the services list and double-click on the “Intuit QuickBooks FCS” option. 
  • Thereon, you have to click on the “Startup Type” option and then select the “Manual” option. 
  • At last, click on the “Apply” and “OK” option. 

You have successfully enabled the QuickBooks Desktop File Copy Service (FCS) by performing the steps mentioned above. Now, launch the QuickBooks desktop application again and try to update the payroll services. If you are still facing the issue, then try the next solution. 

Solution 3. Repair QuickBooks Desktop Application

Let’s discuss the steps you can execute to repair the QuickBooks desktop application on your PC. 

  • First of all, navigate to the control panel settings on your device. 
  • Click on the “Programs” option and select the “Programs and Features” option. 
  • Under the list of available programs, do a right click on the “QuickBooks” option. 
  • After that, click on the “Uninstall or change” option, followed by a click on the “Yes” option. 
  • Moving ahead, click on the “Next” option, and select the “Repair” option. 

Now, the QuickBooks repairing process will commence on your screen. It may take some time, depending on the size of the QuickBooks file. Once the repairing process ends, then examine if the QuickBooks payroll update 15243 has been eliminated or not. 

If the error code 15243 is still existing, then don’t panic and jump to the next solution.

Solution 4. Re-validating QuickBooks Payroll Subscription

If your QuickBooks payroll subscription is inactive, you will not be able to use any of the QuickBooks payroll services and may even face the QuickBooks error 15243. 

In this scenario, you must revalidate the QuickBooks payroll subscription to resolve the QuickBooks error 15243. Given below are the steps that you can execute to re-validate your QuickBooks payroll subscription;

  • First of all, open the QuickBooks desktop application on your PC. 
  • On the home page of the accounting software, click on the “Employees” tab at the top of the screen. 
  • Under the employees drop-down menu list, click on the “My Payroll Service” option.
  • Thereon, you have to select the “Accounting/ Billing Information” option. 
  • You will be automatically redirected to the QuickBooks payroll account maintenance page. 
  • You have to close this page manually, and then the QuickBooks software will re-validate the payroll subscription. 

Once the validating process ends, launch the QuickBooks desktop and update the QuickBooks payroll. If the error persists, you can move to the next solution. 

Solution 5. Download New Windows Update

Suppose you have not updated the PC’s windows for a long time. In that case, it can cause compatibility issues between the QuickBooks and Windows operating system, leading to various QuickBooks errors. In that case, you must update the PC’s windows to the latest release by performing the below steps. 

  • First, press the Windows key on your keyboard to open the windows start menu. 
  • Secondly, you have “Windows Update” in the search box and then hit the enter button.
  • Now, click on the “Check for Updates” option, and if there are new updates available, you will see the “Install Updates” option. 
  • At last, click on the “Install Updates” option, and then the updating process will commence on your screen. 
  • As the updating process, then restart your PC.

After updating the PC’s windows to the latest release, try to update the QuickBooks payroll services. After performing the above mentioned solutions, the QuickBooks payroll update error 15243 must be resolved. 

In Conclusion

As demonstrated above, we have listed five tried and tested solutions you can implement to resolve the QuickBooks payroll update error 15243. Sometimes, a few users may still face problems eliminating the error in some special cases. In such cases, users can connect with our QuickBooks experts to provide quick assistance. Our experts are available 24X7 around the clock to resolve the user’s queries across the globe. 

QuickBooks is one of the best accounting software providing the best and most unique features for small and medium-sized businesses. QuickBooks helps businesses to maintain their bookkeeping tasks at ease. Although, despite having unique features and benefits, users sometimes face various technical glitches, which somehow becomes a challenging task to eliminate the issue. In that scenario, users have the option to speak live with QuickBooks customer service to use the accounting software smoothly.

Despite issues, users may also need to speak with a live agent at QuickBooks related to their account. So, if you also want to acquire a complete knowledge about talking to someone at QuickBooks, stay tuned and read this blog post till the last word.

Tips to Remember Before Talk to Someone at QuickBooks

Below are some important points you must be lined up or remember before placing the call with the QuickBooks customer care team.

  • Keep the license and product number of your QuickBooks account handy.
  • Gather the pertinent information related to the technical error which you are facing. It might be an error screenshot, message, signs or symptoms, or the steps leading to the QuickBooks error.
  • Keep a notepad and pen handy during the call so that you can easily note the important calls during the call.

Keeping these important points in mind will help you speak efficiently with a live person at QuickBooks.

How Can I Talk to Someone at QuickBooks Customer Service Team?

You can easily connect with a live person at QuickBooks in various ways. Well, the easiest and most common way to connect with the QuickBooks customer service team is by placing a call at the customer care number.

So, let’s take a look at the steps you can follow to place a call with a live person at the QuickBooks customer service team.

  • First, you must dial QuickBooks official customer care number, i.e., 1-888-333-3451 or 1-802-327-8055.
  • Thereon, you must select the language for your preference and press 1 to speak with a QuickBooks expert.
  • After that, carefully listen to the IVR menu list, which is as follows.
  • Press 1 for queries related to the product.
  • Press 2 to speak with an agent related to activation or subscription.
  • Press 3 if you want to upgrade the version of your QuickBooks account.
  • Press 4 to create or sign into a QuickBooks online account.
  • If you want to speak with a live agent at QuickBooks, press #.

After that, your call will be automatically transferred to a live agent at the QuickBooks customer care team. You can call the numbers mentioned above between 6 am to 6 pm on Monday and Friday and from 7 am to 4 pm on Saturday and Sunday as per the Pacific Standard Time (PST).

How to Contact QuickBooks Customer Service Team?

Let’s look at the steps you can follow to contact the QuickBooks customer care team.

  • First, open a compatible web browser on your device and navigate to the official website of QuickBooks accounting software.
  • Thereon, wait for a few seconds till the home page gets loaded.
  • Now, as the loading ends, click on the “Contact Us” option available at the top right side of the screen.
  • Here, you will be asked to select the kind of query that you have.
  • Moving ahead, select one of the items from the list of options, and in case your query is not listed, you have to click on the “Search For Something Else” option.
  • After that, provide your question in the search box and click on the search icon. 
  • Now, it will show you a list of options for contacting an official representative at QuickBooks. You can easily select any of the methods and then follow the on-screen instructions to contact the customer service team of QuickBooks.

How to Schedule a Call From QuickBooks Experts?

QuickBooks gives utmost priority to its end users, allowing them to easily connect with their team to avail best in class services. QuickBooks also allows users to schedule a call with their experts to get feasible solutions for their queries. 

Here are the steps that you can follow step-by-step to schedule a call from QuickBooks experts.

  • First, run a compatible web browser on your device, and then navigate to the official website of QuickBooks, i.e., https://quickbooks.intuit.com/.
  • Here, you have to click on the “Talk to Sales” option, which is available at the extreme bottom right side of the screen.
  • Followed by the above-mentioned steps, click on the “Schedule a Call” option. 
  • A new pop-up window displaying the “Schedule a free consultation” message will appear on your screen.
  • Moving ahead, your details, i.e., full name, email, and phone number, and then click on the “Schedule Now” option.

Congrats! By clicking on the “Schedule Now” option, you have successfully scheduled a call back from the official experts of QuickBooks. Their team will contact you within 24 hours to provide the best feasible solution for your query.

QuickBooks Community Page

QuickBooks users can also check out the online community page to avail answers to their questions. The online community page is an online help page through which users can easily browse the Q&A section to get appropriate answers from their experts and the real-time users using the accounting software.

So, let’s discuss the steps that you can easily follow to visit the community page of QuickBooks;

  • First, click here to navigate to the official community page of QuickBooks.
  • Here, you can get the answer to your query by entering the question directly in the insert field.
  • Or you can also scroll down and select the topic in which you are facing the issue. 
  • Through the community page, you can also get relevant information about the solutions which work best for the issue that you are currently facing.

How Can I Live Chat With a QuickBooks Expert?

Another medium through which users can easily connect with a QuickBooks expert is the live chat option. So, here are the steps that you can follow one by one to live speak with a QuickBooks expert through chat.

  • Firstly, you have to navigate to the official website of QuickBooks. 
  • Thereon, scroll down on the official website, and click on the “Contact Us” option, which is available in the footer menu.
  • After that, the contact us page will open on your screen. 
  • Here, you have to click on the help section option and select the live chat option. 
  • Now, wait a few minutes until a live person from QuickBooks gets connected with you. 
  • Thereon, you are all good to chat with a live agent at QuickBooks. 
  • Here, you can easily describe your whole issue and get the best solution from the experts.

How to Connect to QuickBooks Experts via Social Media Platforms?

QuickBooks accounting software is prone to various technical errors, and often, a user may face various issues and troubles in accessing the software. One of the easiest methods to easily connect with QuickBooks experts is social media channels. 

You can easily contact the official experts at QuickBooks via social media platforms. So, let’s look at the different social media platforms of QuickBooks.

So, that’s all with different social media channels of QuickBooks through which you can easily get your query resolved by their experts. 

How to Send a Complaint Form to QuickBooks?

QuickBooks users also get an option to fill out a complaint form to resolve their queries. Well, if you also want to send a complaint form to the QuickBooks customer service team, then here are the steps you can follow.

  • Firstly, visit the official website of QuickBooks.
  • Thereon, click on the “Help” section, and then you will see different ways to avail help from the QuickBooks team.
  • Here, you must select the “Complaint Form” option and provide the details accordingly.
  • Moving ahead, you will be asked to describe your complaint details in depth and click on the “Submit” option.
  • After that, your complaint will be assigned to a representative immediately, and they will take the appropriate actions or steps.

By performing the steps mentioned above, you have now successfully sent a complaint form to QuickBooks experts.

To Summarize

As demonstrated above, we have covered all the mediums and procedures through which you can easily talk to someone at QuickBooks. If the steps mentioned above do not work for you, and your query is still unresolved, then you can reach out to us via chat box. You can also write us your query via mail at info@quickbooksupportnet.com. Our experienced and professional QuickBooks experts are available 24*7 at the help desk to provide the best feasible and relevant solution for your query.

A question always comes to your mind when you install QuickBooks software on your system and Register or Activate QuickBooks Desktop. Whenever you install QuickBooks Desktop, it requires writing or starting the process to use. A screen will appear on the screen displaying “Set up Your Intuit Account” when you access it.

“Get quick assistance to activate QuickBooks desktop with our experts by calling at +1-855-603-0490.”

Go and log in to your Intuit account to share information for existing account details while registering or activating QuickBooks Desktop. You can log in to multiple websites after signing in with your Intuit account. A user can download the start of the services any time after buying them.

This blog will help you in registering or activating your QuickBooks Desktop. You can also take expert help by calling the QuickBooks customer service number to troubleshoot it.

Procedures to Register or Activate QuickBooks Desktop

  • Ensure that QuickBooks is activated or not, press the F2 button or click and hold the Ctrl+1 key
  • If you have received a message that QuickBooks is registered or activated successfully, you must do nothing. If not running, go to the following steps to start it.
  • You get the issue message “the validation code is not correct” at the time of running, go to check the things below
  • The validation code is correct
  • Make sure that the license and the product number are correct. If the license number is not coordinating with the product number, change it before registering or activating your QuickBooks Desktop.

What Are Methods to Register QuickBooks Desktop 2016 or Latest Versions?

You can implement the below-listed steps to register QuickBooks Desktop 2016 or the latest versions.

  • First, start your QuickBooks desktop and then click the F2 key on the keyboard
  • Now, verify the registration status on the product information screen given on the license number’s right side
  • If it is showing activated, you are required to do nothing.
  • If it is displaying not activated mode, then go through the steps mentioned below
  • Click Okay to close the product information screen
  • Next, go to the Help menu and choose to activate QuickBooks. For the 2015 version, select the Register QB button
  • Now, follow the on-screen information and check the details. It is finished by performing the running process
  • Get a Thank You message after the activation procedure is completed.

What Are the Procedures to Register or Activate QuickBooks Desktop on Mac?

If you use a QuickBooks Desktop on Mac, go through some listed procedures to register or activate it.

  • Firstly, move to the Menu and select the option Register QuickBooks
  • You have to mention either license number or product number and also choose Next
  • The following method is to determine the Register Online tab
  • Finally, follow the on-screen instructions and then finish the registration
  • You have got the Register option; then it indicates that the program is already activated or registered.

For Older Series of QuickBooks Desktop

The discontinued products can’t get registered for the first time because of older versions.

You must reactivate it. You can re-register it by reinstalling and dialing the QuickBooks toll-free number for the validation code.

Activate QuickBooks Desktop with Your Intuit Account

The start screen shows the details to register QuickBooks either with an already created Intuit account or with a new one. If your account is not made in your Intuit section, you must type the necessary details in the Id section to complete the activation procedure. If you have lost or missed your user Id and password, you must follow some steps to restore them.

Errors Occur While Registering or Activating Your QuickBooks Desktop

  • Suppose the given information is not accepted, you should confirm and make sure that the data is provided with the same as buying this software.
  • If you encounter an empty screen or error text, or any other technical problem, you can temporarily deactivate your Antivirus software.

The above steps might be helpful for you to register or activate your QuickBooks Desktop. If you encounter any problem in writing and starting QuickBooks Desktop, you must consult with the technical expert through call, email or chat. Once you call them, you will get appropriate solutions to activate your QuickBooks Desktop with a technical representative. A technical help desk is available round the clock to assist you.

It is essential to Install and Setup QuickBooks desktop software in your system or laptop for any organization to keep pace with the advancement of technology. One of the crucial pieces of information that the user should know is the essential tips to download and install QuickBooks software. You will get various steps to install and set up the QuickBooks Desktop and the associated aspects. While going through the installation process, if a user has to encounter any technical problem related to it, they must take the technical suggestions from the expert. You can resolve the issue by calling the QuickBooks support number and get the appropriate solutions.

Decide the Installation Type

The user has typically two options for installing QuickBooks, i.e. express, or custom and network.

Express Install – The installation type is recommended for first-time users, reinstalling QuickBooks, using QuickBooks on a single system.

The methods involved in express install are as follows.

  • Firstly, the user is required to choose the Express and the Next option
  • Then, selectthe install option
  • Finally, opt for Access QuickBooks to get started.

Customer and Network Install – Such type of install is recommended while installing QuickBooks somewhere other than the default option or when the user hosts the company files on a server or setting up a multi-user network.

The methods involved to set up Customer and Network Install are mentioned below.

  • To start with, the user needs to choose the Customer and Network option and press Next.
  • After this, go through the option that describes the way you will use QuickBooks
  • Choose the change to install location option available on the next screen
  • Choose the browse option to decide where to put the QuickBooks folder. The majority of people put in their program folders
  • Choose the next opportunity to start with the install process
  • Once the installation process gets completed, then press on the Open QuickBooks option.

How to Install and Setup QuickBooks Desktop Software?

Go to the step-by-step instruction to install QuickBooks Desktop on your system. Ensure to follow the methods listed below.

  • To start with, the user requires to close all the running programs in the background and on the screen that are accessed on the file server on the desktop
  • After that, visit the QuickBooks Desktop Download option for the new version
  • Then, select the Yes to All icon
  • Hit the Next tab
  • Press on the checkbox beside Agree to License Agreement dialogue and press onto the Next tab
  • Enter the License and Product Number and then press on the Next tab
  • Select the QuickBooks Installation type on the QuickBooks
  • Express – It enables the installer to choose for you;select the option manually
  • Custom and Network Option – Select this if you will be using multiple versions of QuickBooks Desktop on the system or you will use QuickBooks to share data with other users on a network
  • Select the option to use the QuickBooks application
  • Using QuickBooks on your system
  • Sharing company files on your system so that they can be transmitted over a network
  • Won’t using QuickBooks on your system. Storing company file on your system so that they can be shared over a network
  • Choose a new location for the installation or select the next tab to install in the default directory
  • Select the install tab and access the QuickBooks
  • Finally, access QuickBooks and set up to work on it.

We hope that the above steps will help you to Install and Setup QuickBooks desktop software on your system. However, if you can’t use it properly, you must dial the QuickBooks customer service number to fix it quickly.

It’s well-known that QuickBooks makes accounting and managing finance seem easy, but still, some issues need to be taken care of. One such error is an invalid product number in QuickBooks point of sale followed by a code 176109. You must be wondering how to resolve this error code; however, you don’t need to fret as this blog can help all QuickBooks users facing this issue. You can even reach out QuickBooks support for speaking with the technical team to give you the best solution to eradicate this error.

Why Error Invalid Product Number Occurs in QuickBooks Point of Sale?

The reasons why the error code 176109: Invalid Product Name occurs in QuickBooks Point of Sale are:

  • When there is a damaged file in the POS entitlement folder
  • If you use the incorrect product code while installing Point of Sale
  • When you have not logged in QuickBooks as an admin

Steps to Resolve QuickBooks Point of Sale Invalid Product Number

Resolving this issue without an expert’s help became easy as now, you can refer to the steps given in this blog to fix it.

  1. By Deleting the Content of Point of Sale Entitlement Folder

Windows 8

  • You need to the right click on the Start button of your system and then choose File Explorer
  • Now click on the View option and then tick the checkbox of hidden items
  • After that you have to go to C: \ProgramData\Intuit\Entitlement Client\v8
  • Hereafter selecting all files, click on the Delete option
  • Now, after opening the Point of Sale again, you need to register yourself.

Window 7/ Windows Vista

  • Open your system and then right-click on the Start button and then open the Windows Explorer
  • Here you have to click on the option of organize and then select the Folder option
  • Now click on View > Show hidden files and then you have to visit C: \ProgramData\Intuit\Entitlement Client\v8
  • Here you have first to select all the files and then it on Delete button
  • Open the QuickBooks Point of Sale again to complete the registration process

2. Uninstall and then Reinstall QuickBooks Point of Sale

  • You need first to uninstall the QuickBooks Point of Sale from your system
  • You need to reinstall the QuickBooks Point of Sale again; however, remember to install the latest version of this software.
  • If you witness any error while completing the installation process, then you need to run re-installation on Point on Sale
  • You must verify the product number and license number and the register.

3. Rename the WSActivity file

  • Press the Windows and E key together to open Windows Explorer
  • Now you need to navigate to C:\ProgramData\Intuit\QuickBooks Point of Sale XX\Ini.
  • Here you need to right-click on the WSActivity and then select the option of Rename.
  • Make sure to type “OLDWSActivity” in the file name and click on it to save it.
  • After closing the window, you have to follow the above steps to delete the entitlement client folder again.
  • After that, you can relaunch QuickBooks Desktop Point of Sale software.

Even after implementing these solution steps, if the error code 176109 still haunts you, you will be welcome to take the experts’ guidance. You can dial QuickBooks customer service number to speak with the accounting experts for guiding you in resolving the error. This number remains available at all 24 hours to fix the QuickBooks user’s issues without any time and location constraints.

Read Also: QuickBooks Error Code 3371

QuickBooks is an excellent accounting software that offers robust accounting and payroll management features. Like any other software, you need to keep QuickBooks updated so that it runs in its optimal shape. However, when updating QuickBooks, you may encounter hurdles, and one such hurdle is QuickBooks error 15270. This error occurs when you try to update the payroll service from within QuickBooks. When it occurs, it can cause various discrepancies in your payroll processes. Therefore, follow this full post and find some simple and handy solutions to get rid of the QuickBooks update error code 15270. Let’s begin! 

What is QuickBooks Update Error 15270? 

QuickBooks error 15270 falls in the error code group 15XXX, and all issues in this series depict the problem when updating payroll service in the program. However, the reasons behind the errors may vary. QuickBooks error 15270 occurs when downloading the payroll updates due to multi-faceted reasons. The error can take place when another QuickBooks process is already running in the background. Partial installation of the Windows Operating system is also one of the main reasons behind this error. 

QuickBooks Error 15270 Error message

What Are The Possible Reasons Behind Error Code 15270? 

Below are some of the main known reasons that can make QuickBooks Payroll error 15270 crop up:

  • Damaged or incomplete installation of the QuickBooks application. 
  • A weak or unstable Internet connection is also one of the main reasons behind the error. 
  • A corrupted or infected Windows program throws up the QuickBooks error message 15270.
  • The interruption caused due to Windows Firewall can also hinder the update process of the QuickBooks application. 
  • Improperly configured program updates can also bring forth the error. 

Symptoms That You May Experience On The Arrival of The Error 

When there is an ailment, there must be some symptoms. The same goes with the QuickBooks error 15270. You may encounter the below-given symptoms on the arrival of the error: 

  • Active programs on your Windows Desktop crash on the arrival of the error. 
  • Computer crashes on running a similar program with the error code 15270.
  • You may not accomplish the update procedure for the QuickBooks update service. 
  • An error message with the error code 15270 appears on your screen with an extended text explaining the problem. 

Also Read – Fix QuickBooks Error 15215

Preventing Measures To Avoid The QuickBooks Error Message 15270

QuickBooks program issues can be perplexing and time-killing at the same time. Therefore, it is better to take the preventing measures in advance to prevent this error from taking place: 

  • Using a genuine and updated version of the QuickBooks program can keep the error at bay. 
  • You may download the update file and confirm it by hitting on the update complete tab after completion of the update process. 
  • After launching the QuickBooks program, apply the required changes. 
  • Reboot your computer and then navigate to the QuickBooks update service window. Thereafter, click on the Install later option to fix the payroll update file issues. 

However, some issues are inevitable in QuickBooks, and when they arrive, you need to troubleshoot them as soon as possible. 

How To Troubleshooting QuickBooks Payroll Error Code 15270? 

There are some common solutions you may try to implement in order to get rid of the QuickBooks error 15270. Below they are: 

Solution 1: Update QuickBooks Payroll Service Manually 

If an error occurs when updating the QuickBooks payroll service, you may try updating it manually. Below are the steps: 

  • Now that you are all set to troubleshoot, Reopen your QuickBooks.
  • Next, from within the QuickBooks Update window, select Install Later option. 
  • Now go to the Help section and select the Update QuickBooks option. 
  • Click OK, and it will enable the QuickBooks updates to reset. 
  • Here, choose the right options to proceed further and select Install Now option. 
  • Thereafter, you need to select Download Entire Payroll Update to update your QuickBooks Payroll service subscription. 
  • In the end, select Update, and it will end the manual update procedure for the QuickBooks Payroll service. 

Solution 2: Install QuickBooks Software In Selective Startup Mode 

Selective startup mode allows you to choose the services or programs you want to open and which you don’t want to open at the startup tab. Installing QuickBooks in selective startup mode prevents the interference caused due to other programs. Follow the below stated steps: 

  • From within the Enhanced Payroll service, go to the Employees section, select My Payroll Service and then Account Information. 
  • Log into your Intuit account and then check the QuickBooks Payroll Account Maintenance page and other payroll subscription activities. 
  • Here, you need to also verify that Internet Explorer is your default Internet browser. 
  • To proceed further with the solution, you need to disable the User Account Control manually. 
  • Moving ahead, select Repair QuickBooks Desktop. 
  • In the end, select Selective Startup, and it will perform the clean QuickBooks installation. 

Solution 3: Make Use of Reboot.bat File 

If you are still unable to update your payroll tax tables, the reboot.bat file can help. It helps to re-register the Intuit-related .DLL and .OCX files in MS Windows. It may help in eradicating the QuickBooks update error 15270: 

  • Before you start the endeavor, turn off the QuickBooks application.
  • Next, navigate to the folder containing the reboot.bat file and open it. 
  • When advancing, right-click on the QuickBooks icon, and a drop-down menu will show up wherein you need to choose Properties. 
  •  Click on the Open file location option. 
  • Now in the same folder, right-click the reboot.bat file and choose the Run As System Administrator option. 
  • Here, you will notice a black window scrolling file names. Wait for this window to get closed automatically.
  • Restarting the program will troubleshoot the QuickBooks error 15270

Solution 4: Disable the User Account Control (UAC) Settings

Let’s look at the steps you can follow to disable the User Account Control (UAC) settings on your PC.

Windows 7 & Vista:

  • Firstly, run the windows run command by pressing the “Windows + R” keys together.
  • Thereon, type “Control Panel” in the search box and then click on the “OK” option.
  • Next, click on the “User Accounts” option and select the “Change User Account Control Settings” option.
  • Moving ahead, move the slider towards the “Never Notify” option and click on the “OK” option. 

Windows 10 & Later:

  • Like the above steps, navigate to your PC’s windows control panel settings.
  • Now, select the “Classic View” option available on the left side of the screen.
  • Moving ahead, perform a double click on the “User Accounts” option.
  • Next, click on the “Turn User Account Control On or Off” option.
  • Thereon, clear the user account control, which will help protect the PC and software.
  • Now, save the updated changes by clicking on the “OK” option and perform a deep restart of your PC.
  • At last, launch the QuickBooks software again and open the company’s file. 

Solution 5: Set the Internet Explorer as Default Browser

Setting the Internet Explorer as the default web browser can also be a solution for fixing many errors related to the QuickBooks software. Here are the steps you can follow to set Internet explorer as the default web browser on your PC. 

  • Firstly, launch the Internet explorer browser on your PC.
  • Now, click on the “Gear Icon,” available at the top right side of the screen.
  • Under the settings list, click on the “Internet Options.”
  • Click on the “Programs” tab and select the “Make Default” option.
  • At last, save the updated changes by clicking on the “Apply” and “OK” option. 

Solution 6: Use the Windows Repairing Tool

Using the windows repairing tool on the QuickBooks desktop will recreate all the existing QuickBooks desktop files. If any corrupted files are interfering with the payroll update, then the tool will recreate all of these files. Below are the steps you can follow to run the windows repairing tool on your PC.

  • Firstly, run the Windows command on your PC by pressing the “Windows + R” keys together.
  • Afterward, type “Control Panel” in the search box and press the enter button.
  • Thereon, search there for the “Programs and Features” option and perform a click on it.
  • Under the programs window, click on the “Uninstall a Program” option.
  • Then, under the programs list, double click on the “QuickBooks” option.
  • Next, click on the “Uninstall/ Change” option, followed by a click on the “Continue” or “Next” option.
  • Now, click on the “Repair” option, and the repairing process will commence on your screen.
  • Once the process ends, then click on the “Finish” option and perform a restart of your PC.
  • At last, update the QuickBooks desktop to the latest version and try to download the payroll updates again.

To Make The Long Story Short!

QuickBooks update error 15270 is a commonly reported error in the program that occurs when updating payroll service in the software. When doing so, multiple possible factors can interfere with or obstruct the procedure. In such a case, you need to eliminate the error immediately to prevent the disruption caused. This post elaborates on the best solutions to troubleshoot the error code 15270 in QuickBooks. If this help is not sufficient, reach out to our QuickBooks professionals for extended support for payroll update errors. 

Posts pagination