QuickBooks error 15101 is a common error that occurs when updating QuickBooks Desktop or payroll service. A missing or outdated digital certificate is one of the main reasons for this error. Also, weak internet connection or Internet security settings blocking the update process are some other possible reasons. When the program update fails, you can’t access the improved features. Therefore, here is a friendly guide for you that explains the best troubleshooting solutions to eradicate the error.
Description Of QuickBooks Error Code 15101
QuickBooks error 15101 is a common error code that belongs to the error code series 15XXX. All the error codes from this series depict an error with the QuickBooks Desktop or payroll service update. However, the reasons for the errors can vary from one error code to another.
Error 15101 in QuickBooks occurs when there is an Internet connectivity issue. Besides, it can be your Internet security settings that are blocking the program update, considering it a security threat. When the error occurs, the system becomes slow, and the update process is killed by this error message:
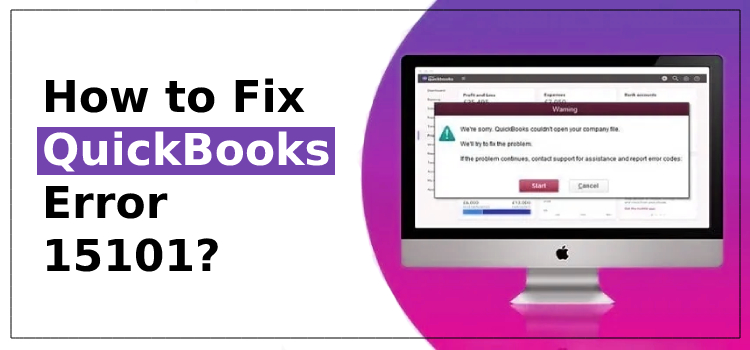
“Error 15101: When updating QuickBooks desktop or payroll”.
When you see this error message on your screen, buckle up and get ready for the troubleshooting.

What Gives Rise To QuickBooks Update Error 15101?
There is no single factor contributing to the arrival of the QuickBooks error 15101, but there are many. Also, knowing these possible reasons is essential for an effective resolution of the error. Therefore, we have mentioned the common reasons in the following list:
- Windows Firewall is blocking QuickBooks from Internet connection.
- Internet Explorer is not defined as the default browser for using QuickBooks.
- Missing components in QuickBooks Payroll update.
- Disabled QuickBooks File Copy services.
- Problematic Windows files can also give rise to QuickBooks error 15101.
- Third-party applications can also hinder the QuickBooks update process.
- Failed digital signature verification is also one of the common reasons.
- Improper mapping of the shared download.
What Signs To Look For To Identify The QuickBooks Payroll Update Error 15101?
When the QuickBooks error 15101 occurs, you will notice an error message code, which is the first and most apparent sign. In addition to that, you will see a few more signs, such as:
- Disrupted QuickBooks payroll update process.
- Windows OS is running lethargic.
- Keyboard and mouse inputs are not getting quick responses.
- Frequent system crashing or freezing can be experienced.
How To Troubleshoot Error Code 15101 In QuickBooks?
Knowing the possible reasons behind the error code 15101 in QuickBooks is half the job done. Now, you will have to eliminate the factors that are promoting the payroll update error during the process. Below are the targeting solutions that can help you eradicate the possible reasons, thereby eliminating the error:
1st Method: Rectify Your Internet Explorer Settings
Make sure that Internet Explorer is configured to run the QuickBooks application by default. Also, the settings of the Internet browser must support the QuickBooks update process. Below is how to ensure this:
- In the first place, you need to open the Run window (Windows + R).
- In the Run box, type ‘INETCPL.CPl’ and click the OK button.
- Now, go to the General tab and choose Temporary Internet Files and Website Files.
- After making the selections, click on the Delete tab.
- Here, you need to choose the Connections tab and then click LAN settings.
- Now, you are supposed to click Detect settings and then the OK button.
- When in the Advanced tab, move down to the Security option.
- Here, you need to make sure that the TLS 1.2 box is checked.
- Also, the boxes for TLS 1.0 and TLS 1.1 must be unchecked.
Save these settings and try to update the QuickBooks application again. On receiving the QuickBooks error 15101 again, move to the next solution.
2nd Method: Install The Missing Digital Signature Certificate
Updating QuickBooks requires your digital signature certificate to be intact. If not, you need to download and install the digital signature certificate on your system. Below are the steps:
- Download it on your device and save it to a preferred (easily accessible) location.
- Now, navigate to this location and locate the executable file QBW32.exe.
- If you are a Windows 7 user, you can use the search option to locate it.
- When in the folder containing the executable file, right-click QBW32.exe and choose Properties from the drop-down menu.
- Now, choose the Digital signature tab and ensure that you have selected Intuit Inc. from the signature list.
- Thereafter, click on the option labeled Details.
- When in the Digital signature details window, choose the View certificate option.
- When the certificate window shows up, choose Install certificate and click Next.
- It will show up a dialogue box having a Finish tab.
- Click on Finish to complete the procedure and restart your system.
- Try installing the QuickBooks updates and check if the error is resolved or not.
3rd Method: Run A Clean Installation of QuickBooks Software
If the error still persists, perform a clean installation of the QuickBooks application. It will resolve the problem if a partial or damaged installation of the QuickBooks application is promoting the update problem.
- In the first place, you need to quit the pre-installed QuickBooks application.
- Thereafter, you have to uninstall the program from your device using the QuickBooks Clean Install Utility.
- Once done, Rename the installation folder.
- You can either download and use the Clean installation tool or rename the folders manually.
- Finally, reinstall QuickBooks and check the status of the QuickBooks error 15101.
4th Solution: Restart Your System In Safe Mode
Running the system in Safe Mode prevents the update process from interference caused by third-party applications. Below are the steps for the same:
- Restart your system and tap the F8 keys repeatedly to open the Boot menu.
- Here, you need to select the Safe mode with the networking option.
- Thereafter, choose the operating system you want to restart and hit the Enter key.
- Now, log into your system with the admin credentials, as it will allow the required permissions to make some crucial changes.
- After that, click the Yes tab when specified to work in the Safe mode setting.
- Now, launch the QuickBooks application and run the update task again.
- Once done, reboot your PC to conclude the procedure.
5th Solution: Prevent The Update From The Firewall Obstruction
If the error code 15101 in QuickBooks is caused by Firewall obstructions, you need to modify the Firewall settings to eliminate the problem. Here’s how to do it:
- Using the Start menu, search your Firewall and then open it.
- When in the Firewall, move to the Advanced Options.
- After that, right-click on Inbound Rules & choose a New Rule.
- Now, navigate to the Program option and then hit the Next button.
- Next, in the Browse section, choose This Program Path to move ahead.
- Look for the QuickBooks executable files and then click the Next button.
- Advancing further, allow the connection, and click Next again.
- Here, you need to check and confirm that all profiles are marked.
- After confirming, click the Next button.
- Now, create a rule and give it a suitable name. It will look like this: “QBFirewallException(name.exe).”
- After implementing all the steps, open QuickBooks and check the status of QuickBooks error code 15101.
Winding Up!
QuickBooks updates are crucial, and by performing the solutions explained in this post, you can eradicate the QuickBooks update error 15101. However, if the technical difficulties are stopping you from accomplishing the procedure, then no need to worry. You can speak to a live support agent, explain your issues, and get hassle-free assistance in the error resolution.
Frequently Asked Questions (FAQ’s)
What are the drawbacks of using an outdated QuickBooks?
Ans: Using outdated QuickBooks means you are missing the improved features of the program. Also, an outdated QuickBooks program can make you prone to multi-faceted technical issues.
What is the process to reset my QuickBooks update?
Ans: You need to first launch the QuickBooks update. Thereafter, go to the Help menu and then choose the Update QuickBooks Desktop. Consequently, go to the Update Now tab and then finally choose the Reset Update Checkbox.
How to prevent QuickBooks error code 15101 from taking place?
Ans: If you want to keep the QuickBooks error message 15101, update QuickBooks at regular intervals. Make sure that your Internet connection is stable when implementing the available update. Configure your Firewall in a manner that does not block the QuickBooks update.
How to get help for resolving the update error in QuickBooks?
Ans: If you have tried all the solutions or are facing a problem in the execution due to which the error is not resolved, you can get help from the experts. Simply dial the QuickBooks customer service number, and it lets you speak with someone from the help desk.